Manoa Study Hub
Table of Contents
Overview
A common problem in our technology driven era can often be a lack of face to face communication among students and their peers. Let’s face it- it can be hard to ask for help in a room full of people who all seem to know what they’re doing, but our application Manoa Study Hub, provides a solution to this often intimidating situation. Manoa Study Hub provides a platform for students to organize study groups with each other in order to work on assignments, projects, or to prepare for tests. This web application will help students to find other students to collaborate with by utilizing our create and attend study session features. In addition, this web application can help students keep track of their past, current, and future study sessions as well as keep track of other students or tutors that they may have met at those study sessions.
Manoa Study Hub can be accessed through this link. Our GitHub organization can be found here.
User Guide
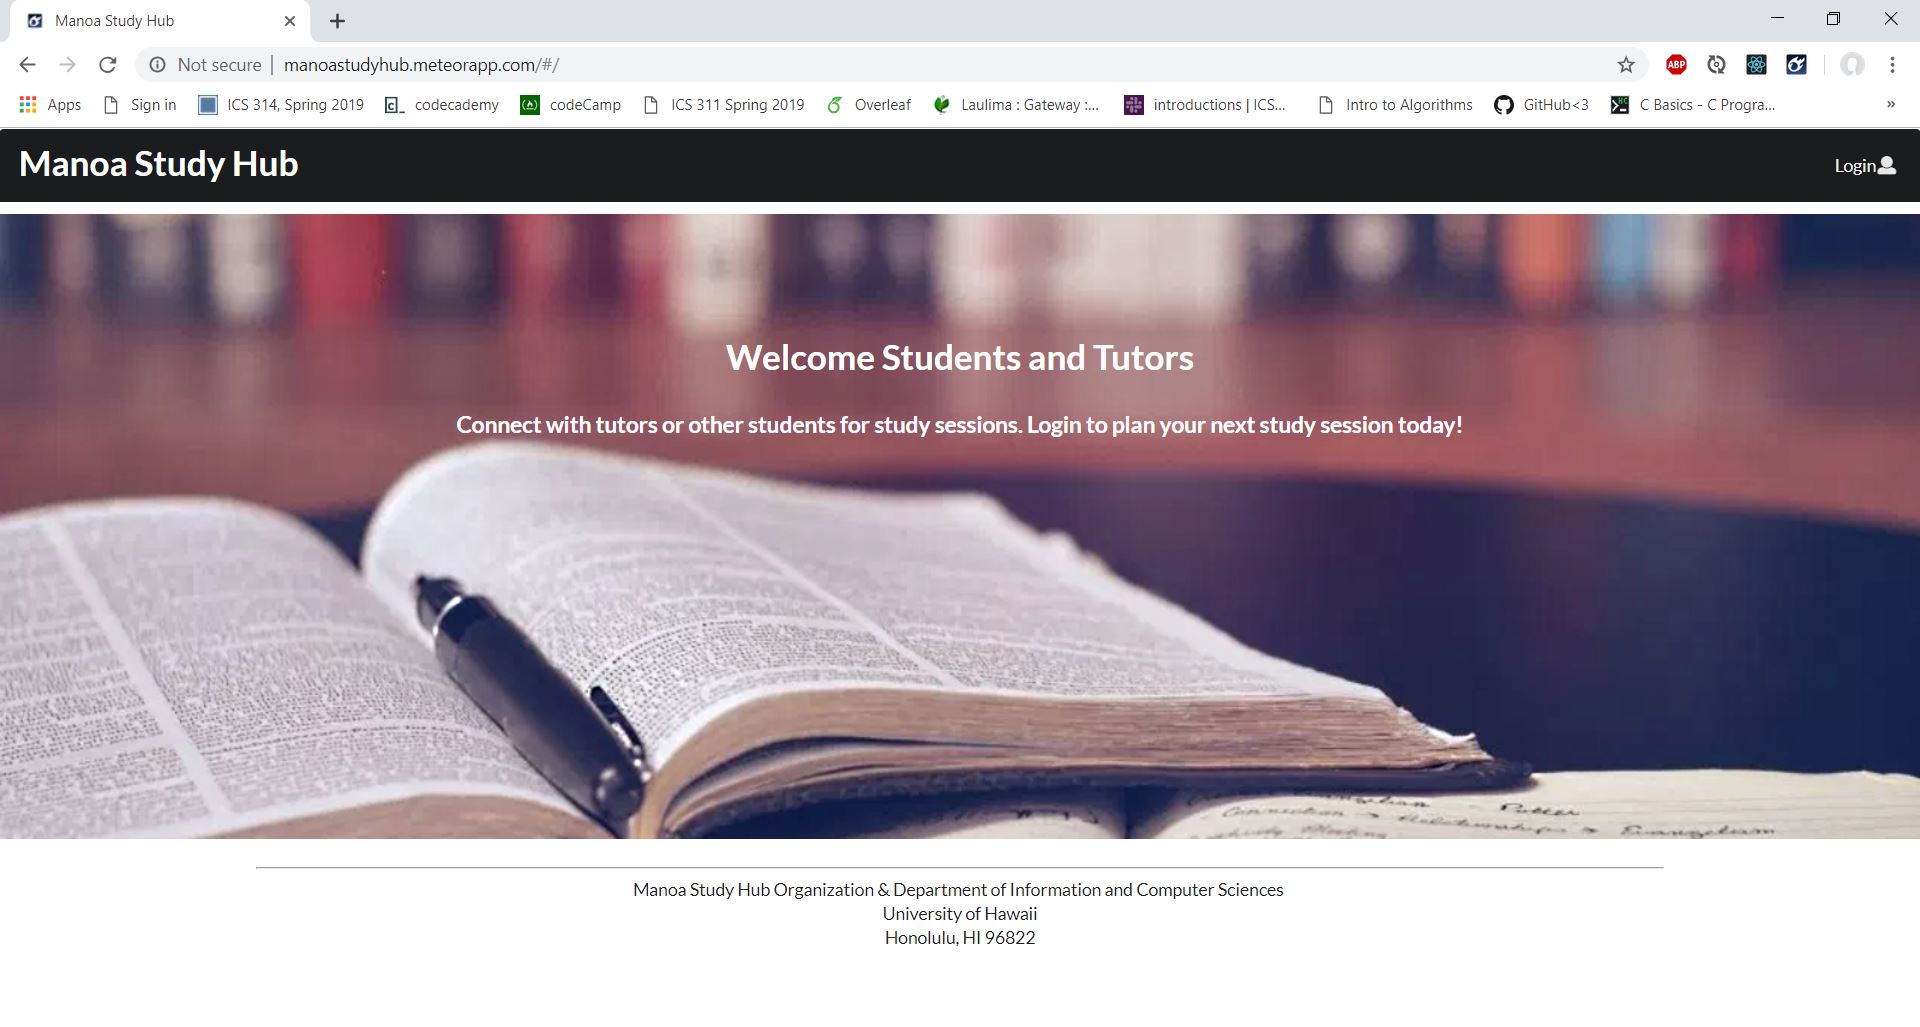
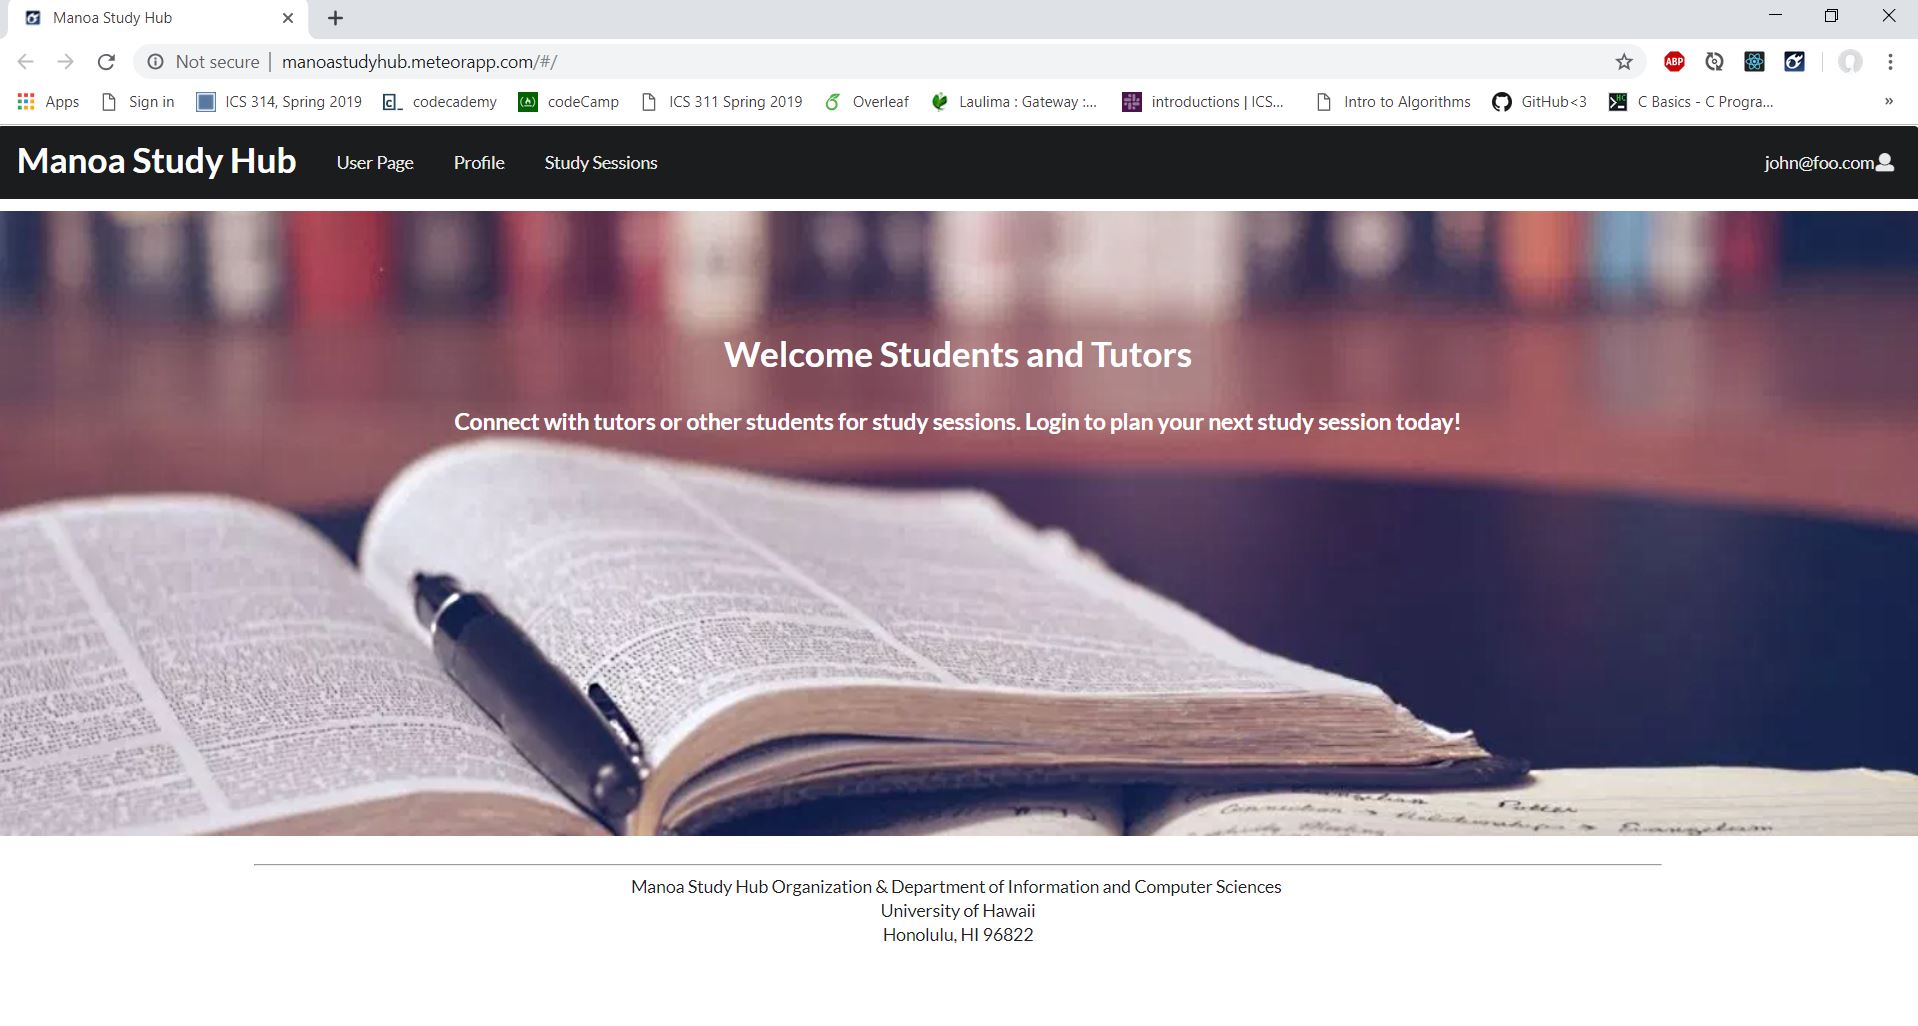
Landing Page
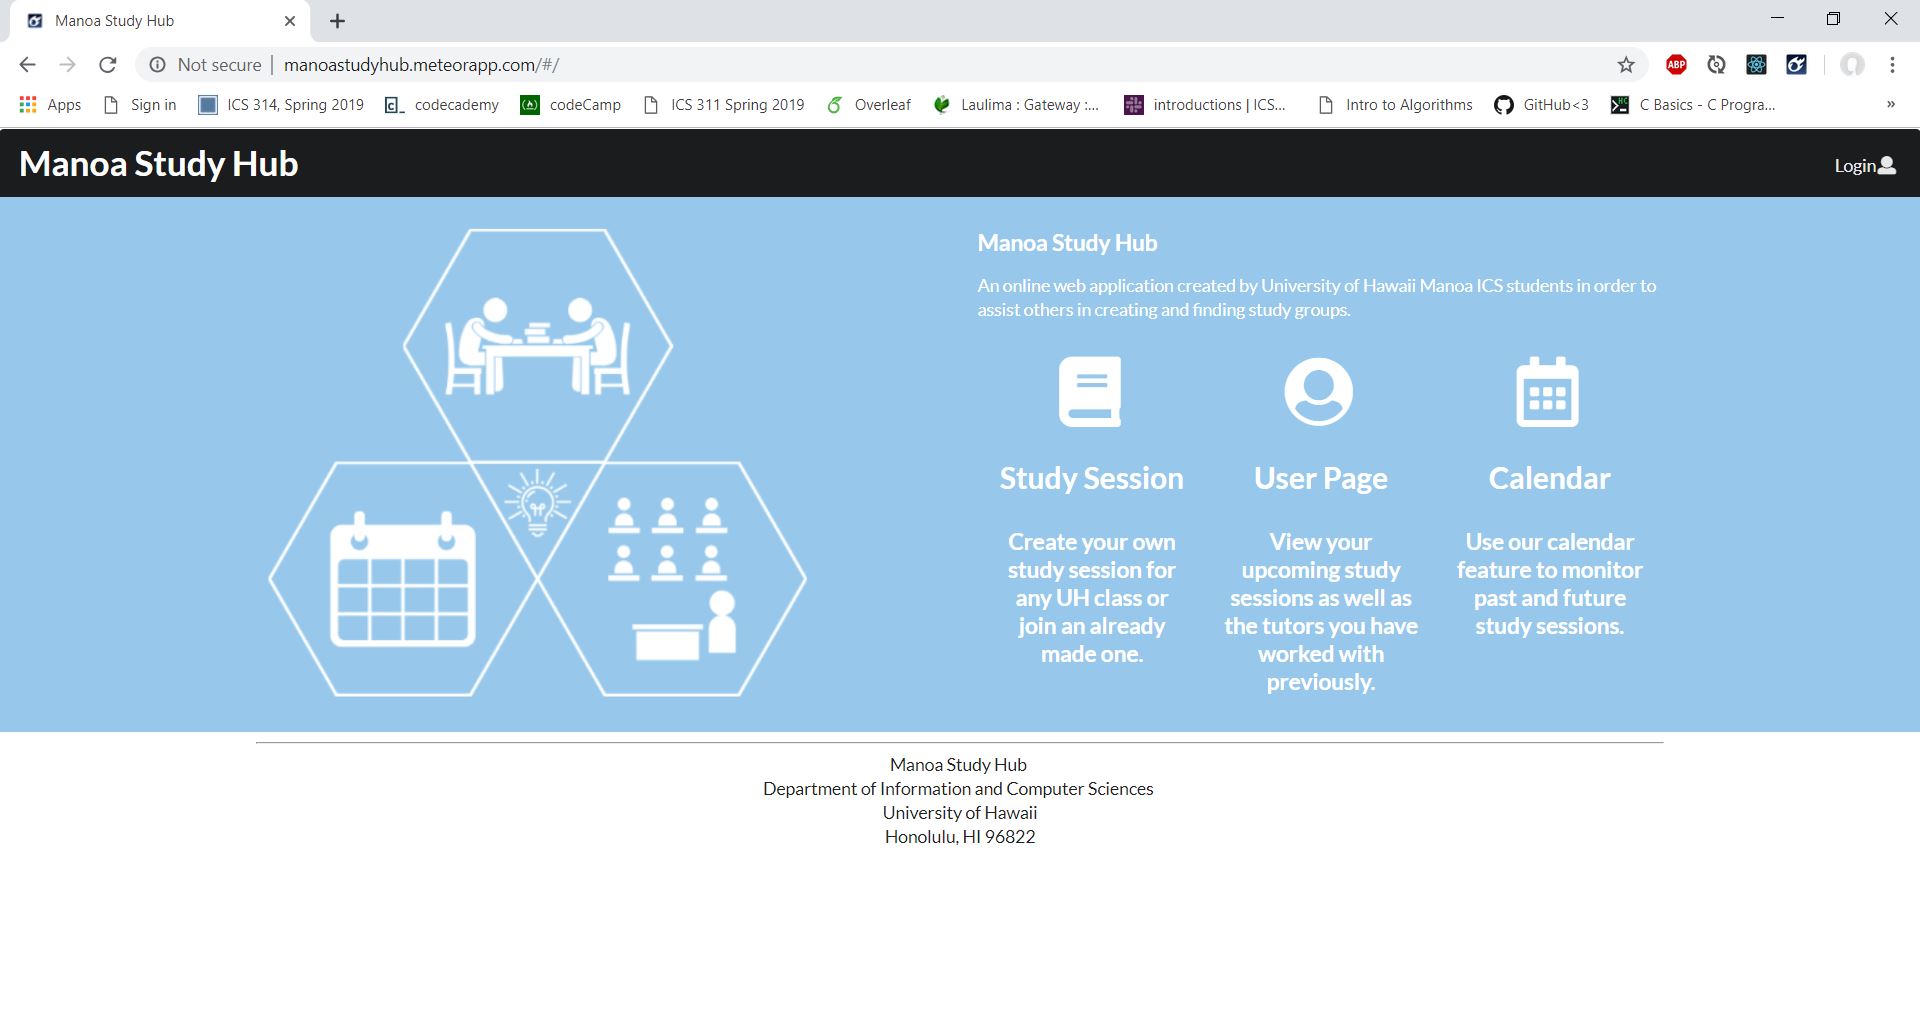
When you first visit our site you are taken to the landing page, where you can read a brief description about Manoa Study Hub as well as some of the functionalities that our site can provide. From this page you are able to use the Login button which presents you with a dropdown menu that allows you to either sign in or sign up for a new account.
Sign Up Page
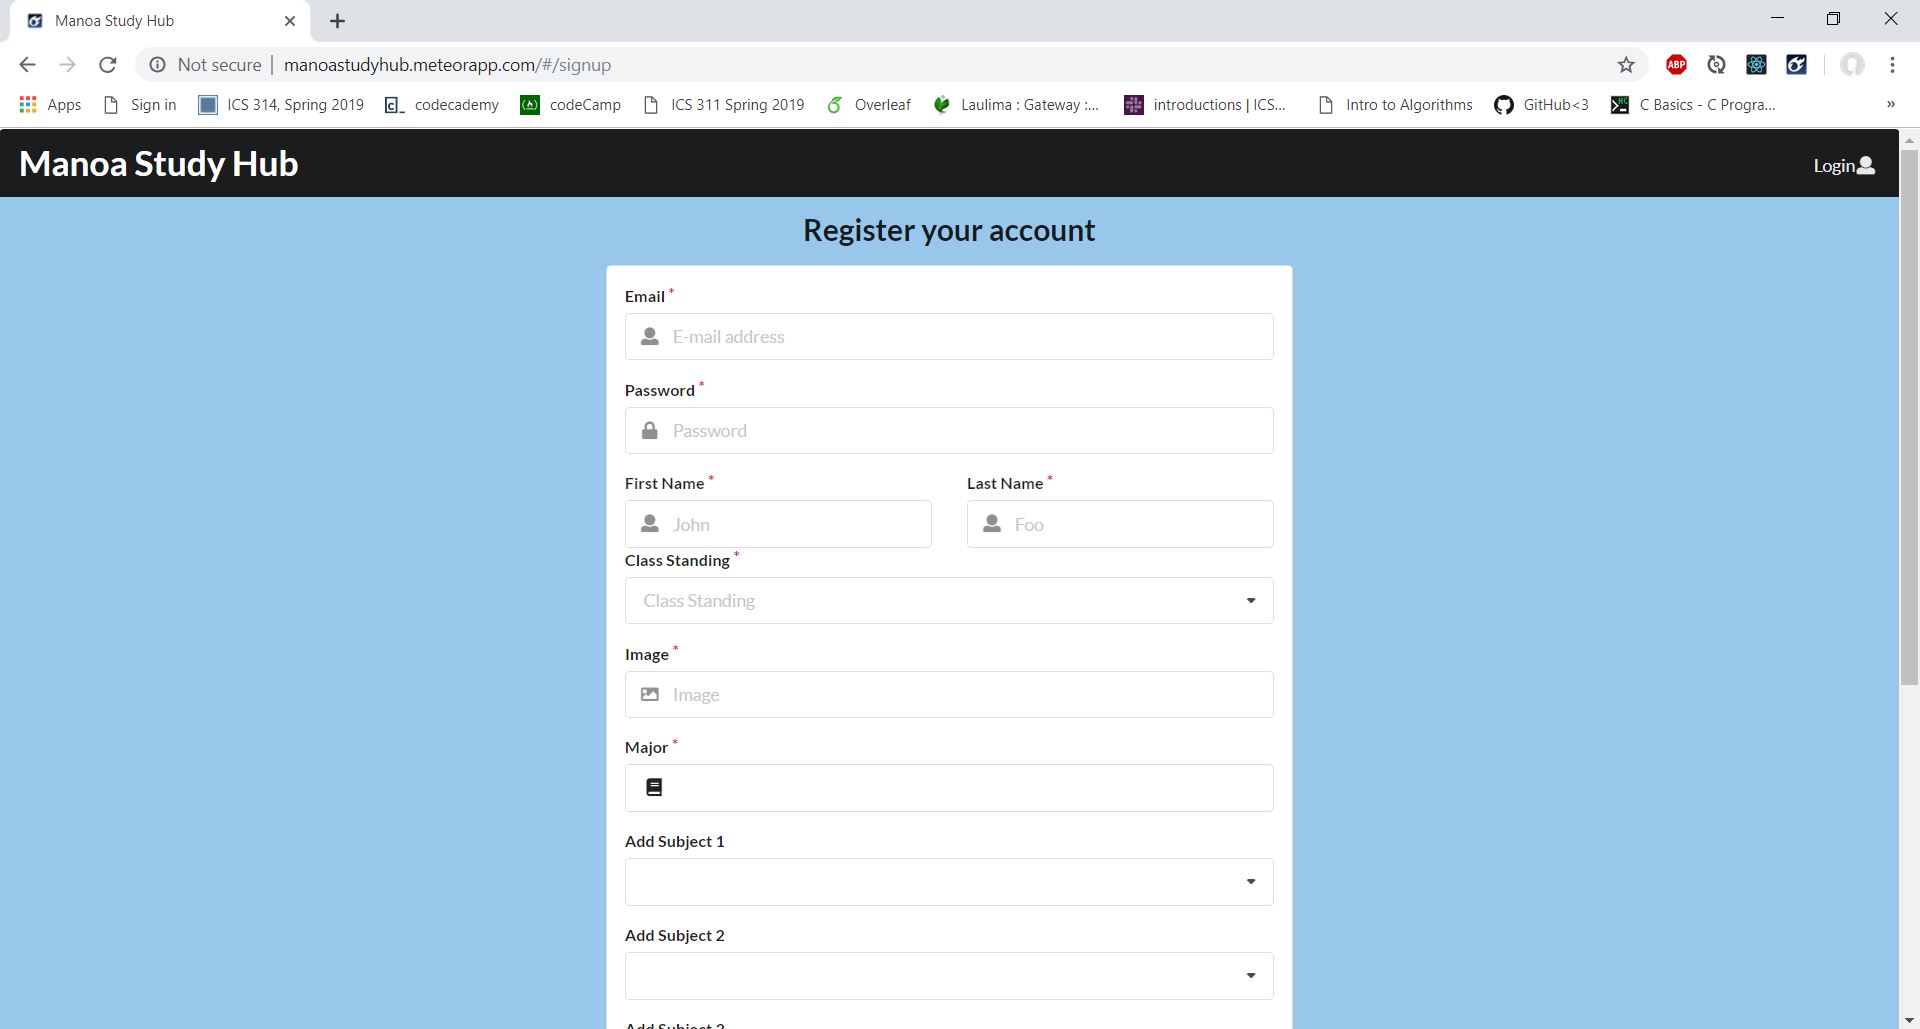
After clicking the Login button on the landing page, if you selected the option to sign up- this is the page you would be rerouted to. On this page you are able to enter some general information about yourself such as your preferred email address as well as a password, first name, last name, class standing, image for you profile, major, subjects you're taking courses in, a description about yourself, and indicate if you are a tutor or not and a submit button for when you have completed your registration information. If you realize that you already have an account with us you are able to use the "Login here" option which would then reroute you to the sign in page.
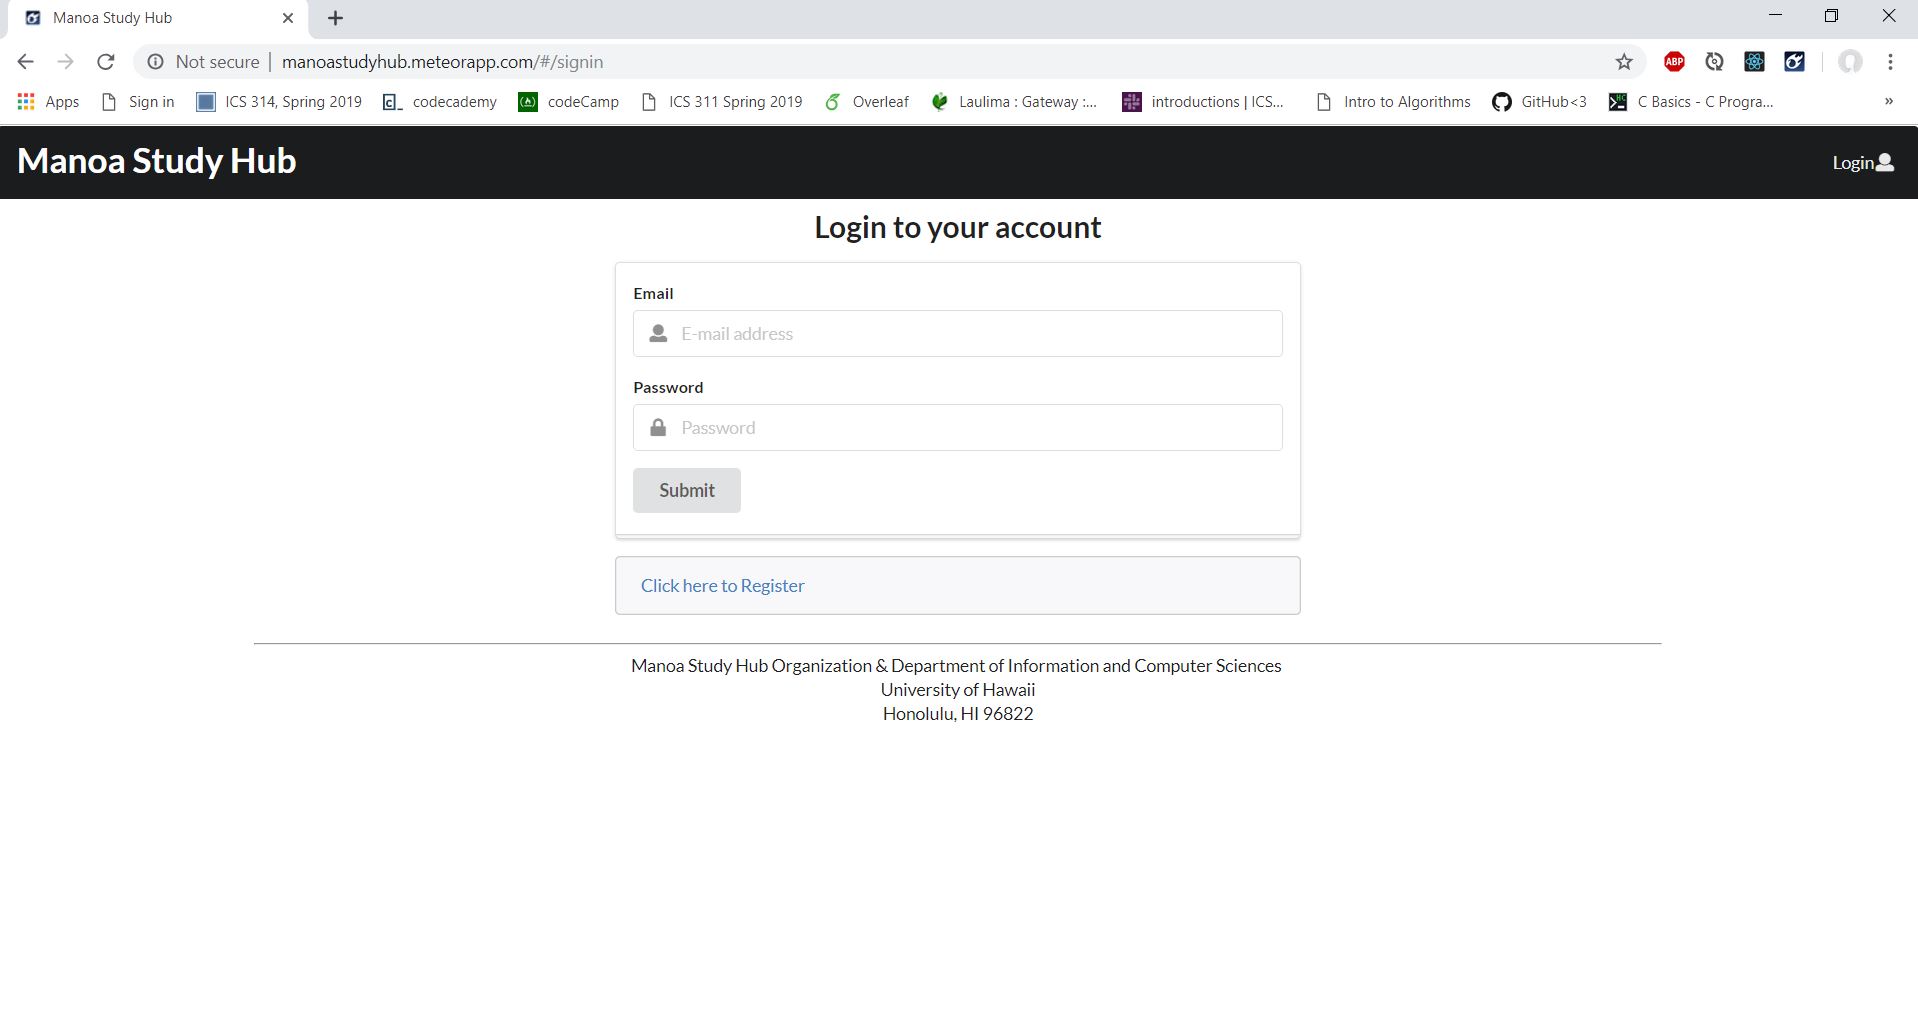
Sign In Page
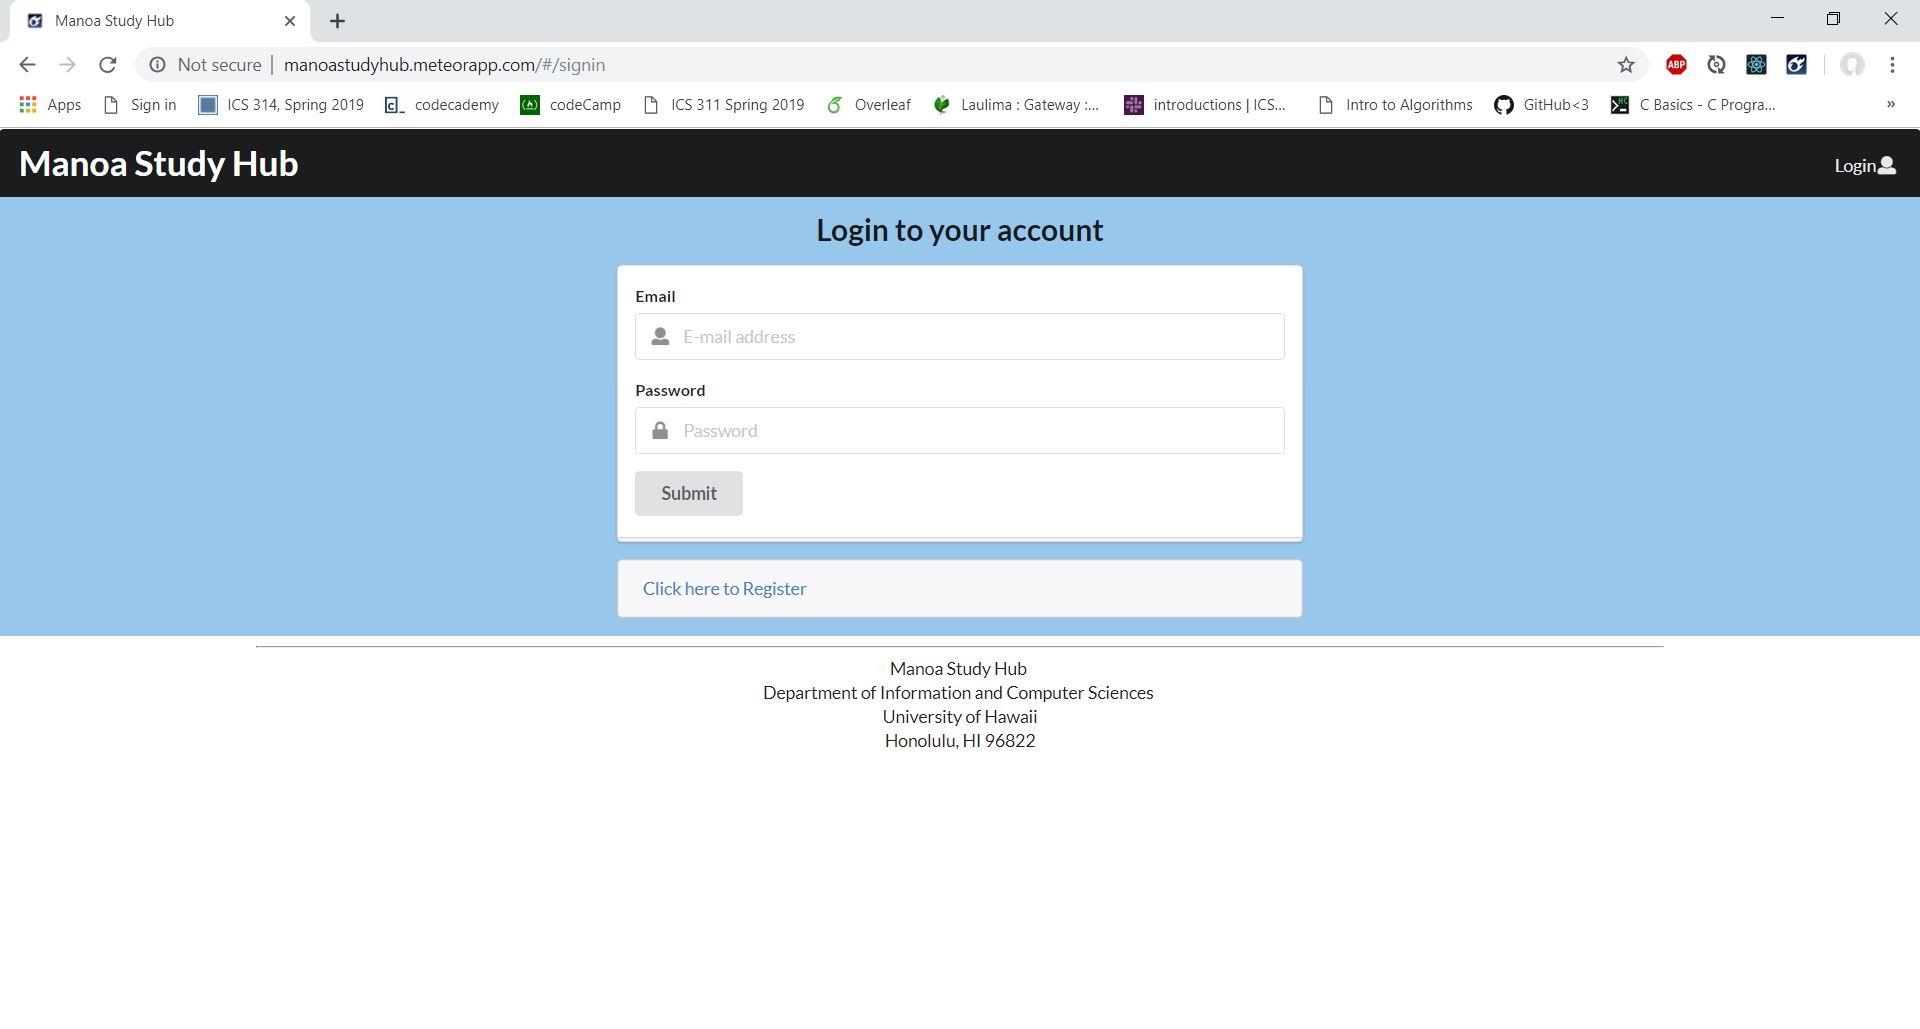
After clicking the Login button on the landing page, if you selected the option to sign in- this is the page you would be rereouted to. On this page you are able to enter the information of the existing account that you previously created, which would include your email and password. After you may click the "submit" button to proceed into the main site. If you suddenly realize that you did not have a pre-existing account with us you are able to use the "Click Here to Register" option which would then reroute you to the sign up page.
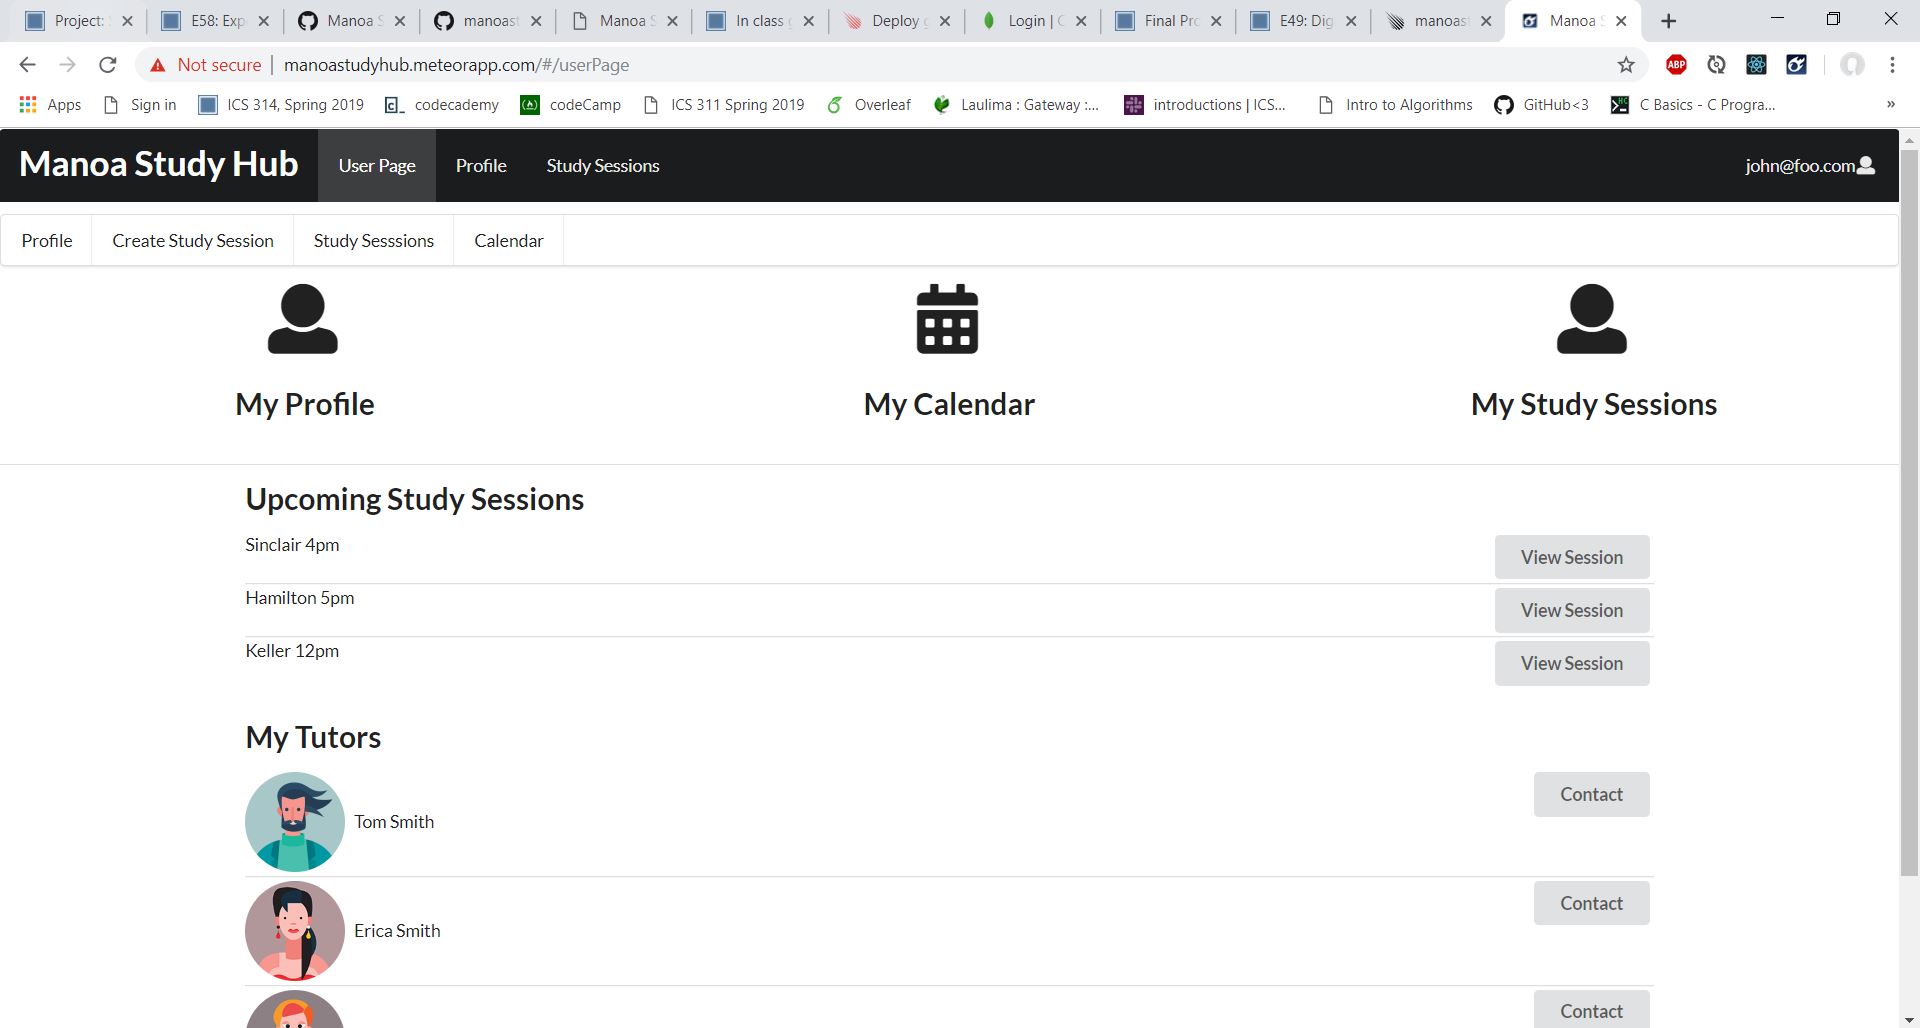
User Home Page
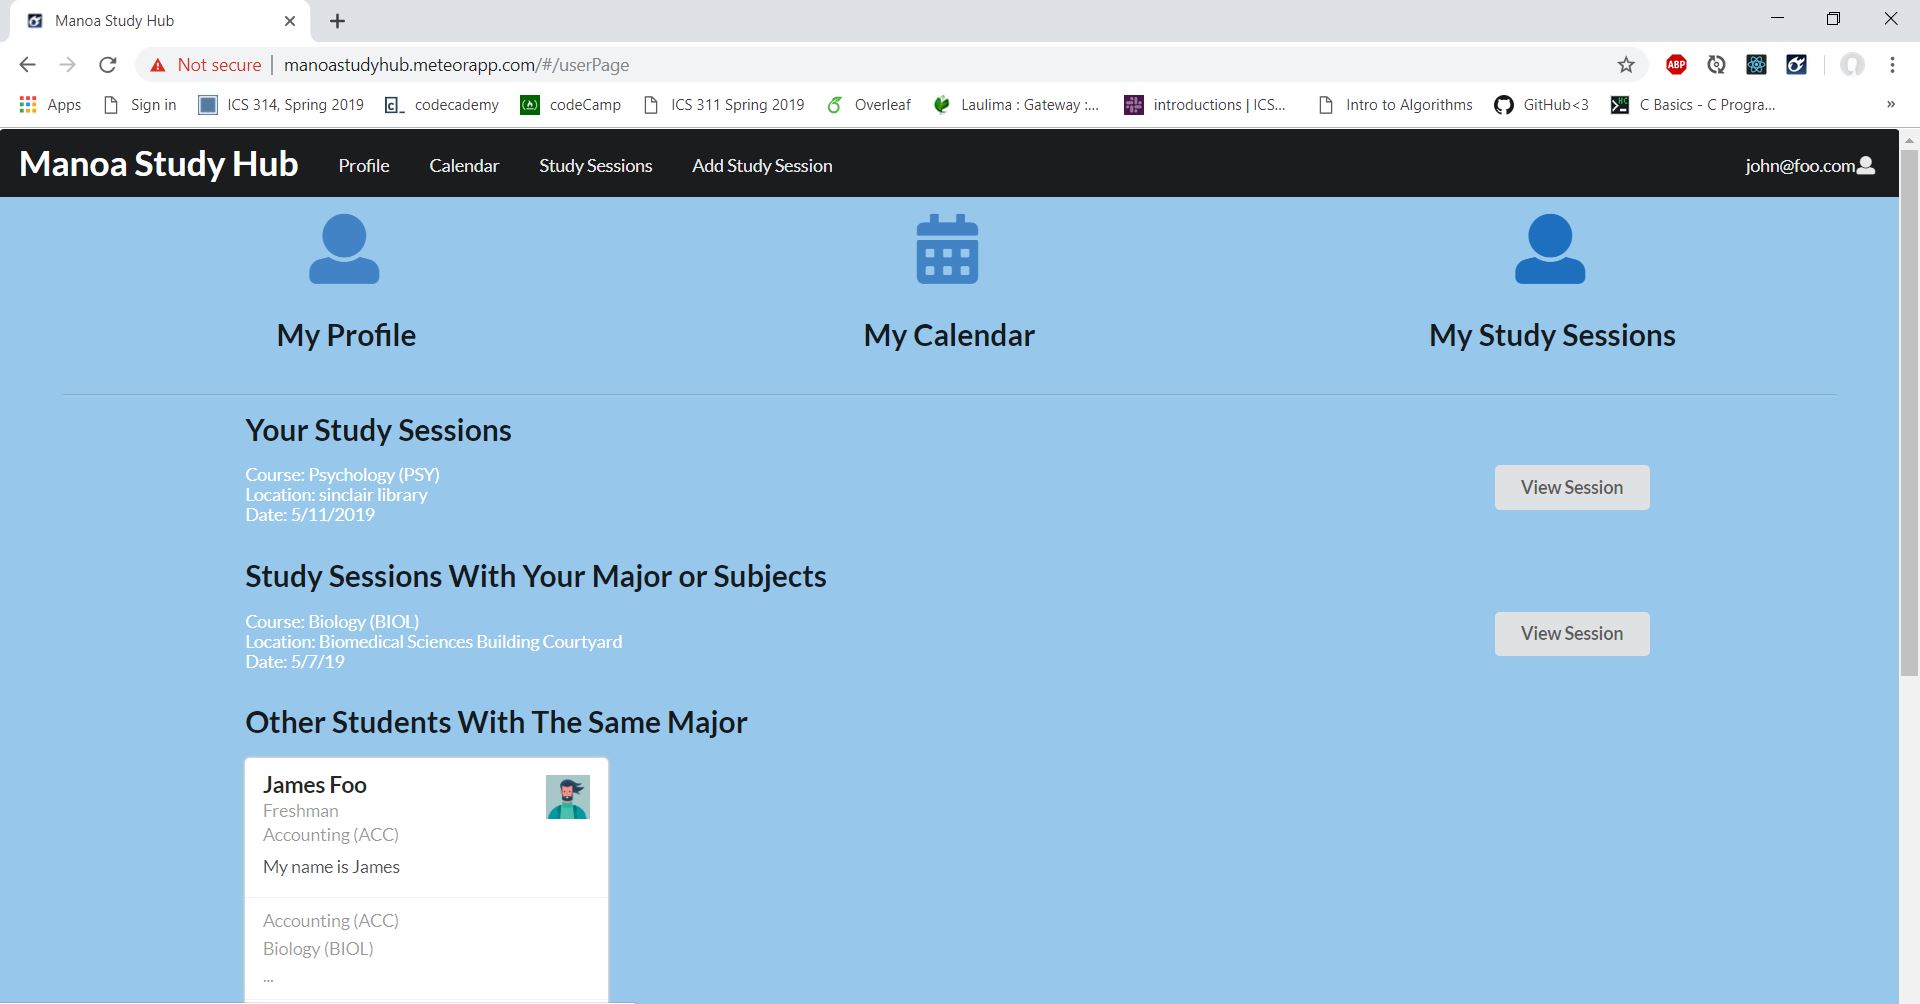
After successfully signing in or signing up you are taken to the user home page which comes equipped with a navigation bar and shows the email of the user who is logged in. The nav bar has options of other pages to be reouted to which include: the Profile page, Calendar page, Study Sessions page, Add Study Session page, as well as the "Manoa Study Hub" words which double as a link back to the user home page (this page) from any of the other pages. The email of the user who is logged in is also visible in the upper right hand corner which, when clicked provides the option to log out. At the top of this page you can view the main components of the site which include the "My Profile", "My Calendar", and "My Study Sessions" pages which are buttons that will reroute you to their respective pages. It also allows you to view your study sessions that you have indicated that you intend to attend in a list format as well as a list of study sessions with your major or subjects that you may also be interested in. These lists also come equipped with a view session button for each session listed that creates a popup window to show the card with more in-depth detail about the study session. It also has a section to show the profile cards of other students that have the same major as you as well as a section to show you the cards of other students whoa re taking similar subjects as you. These profile cards also have view profile buttons that can be used to be rerouted to the respective students profile page.
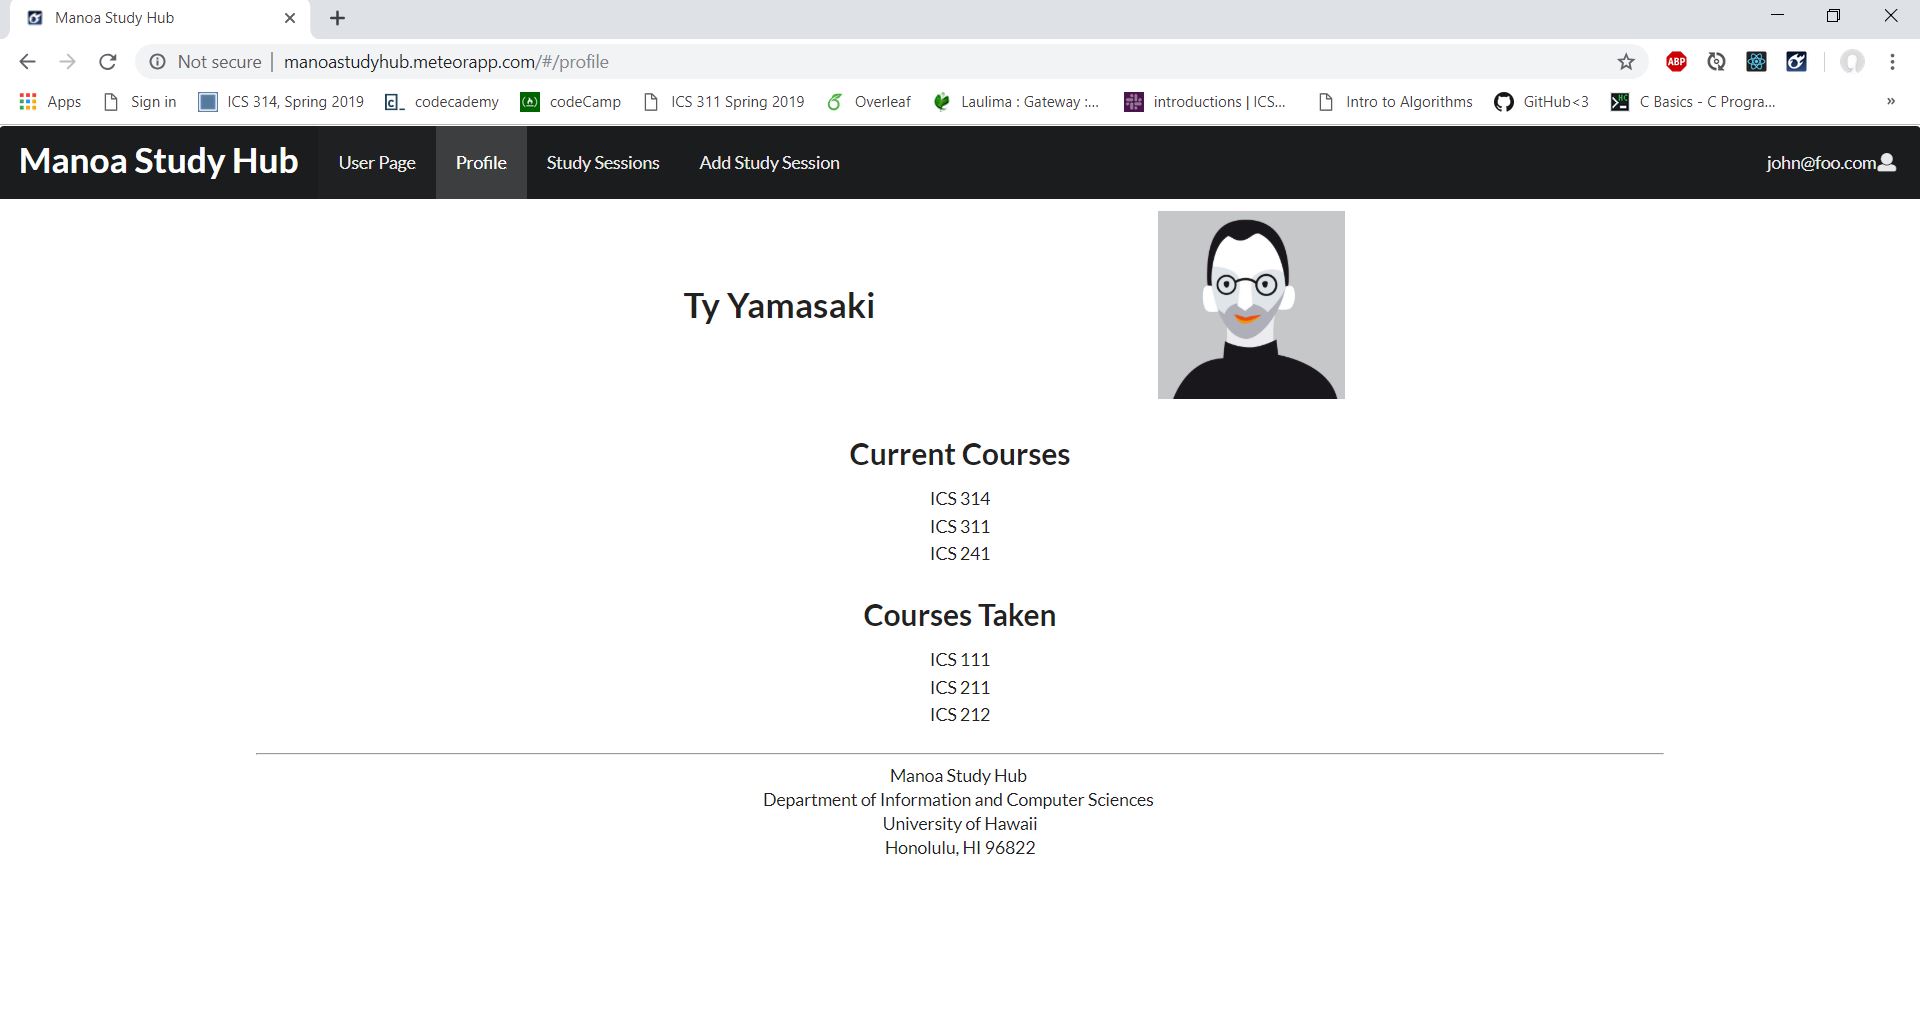
Profile Page
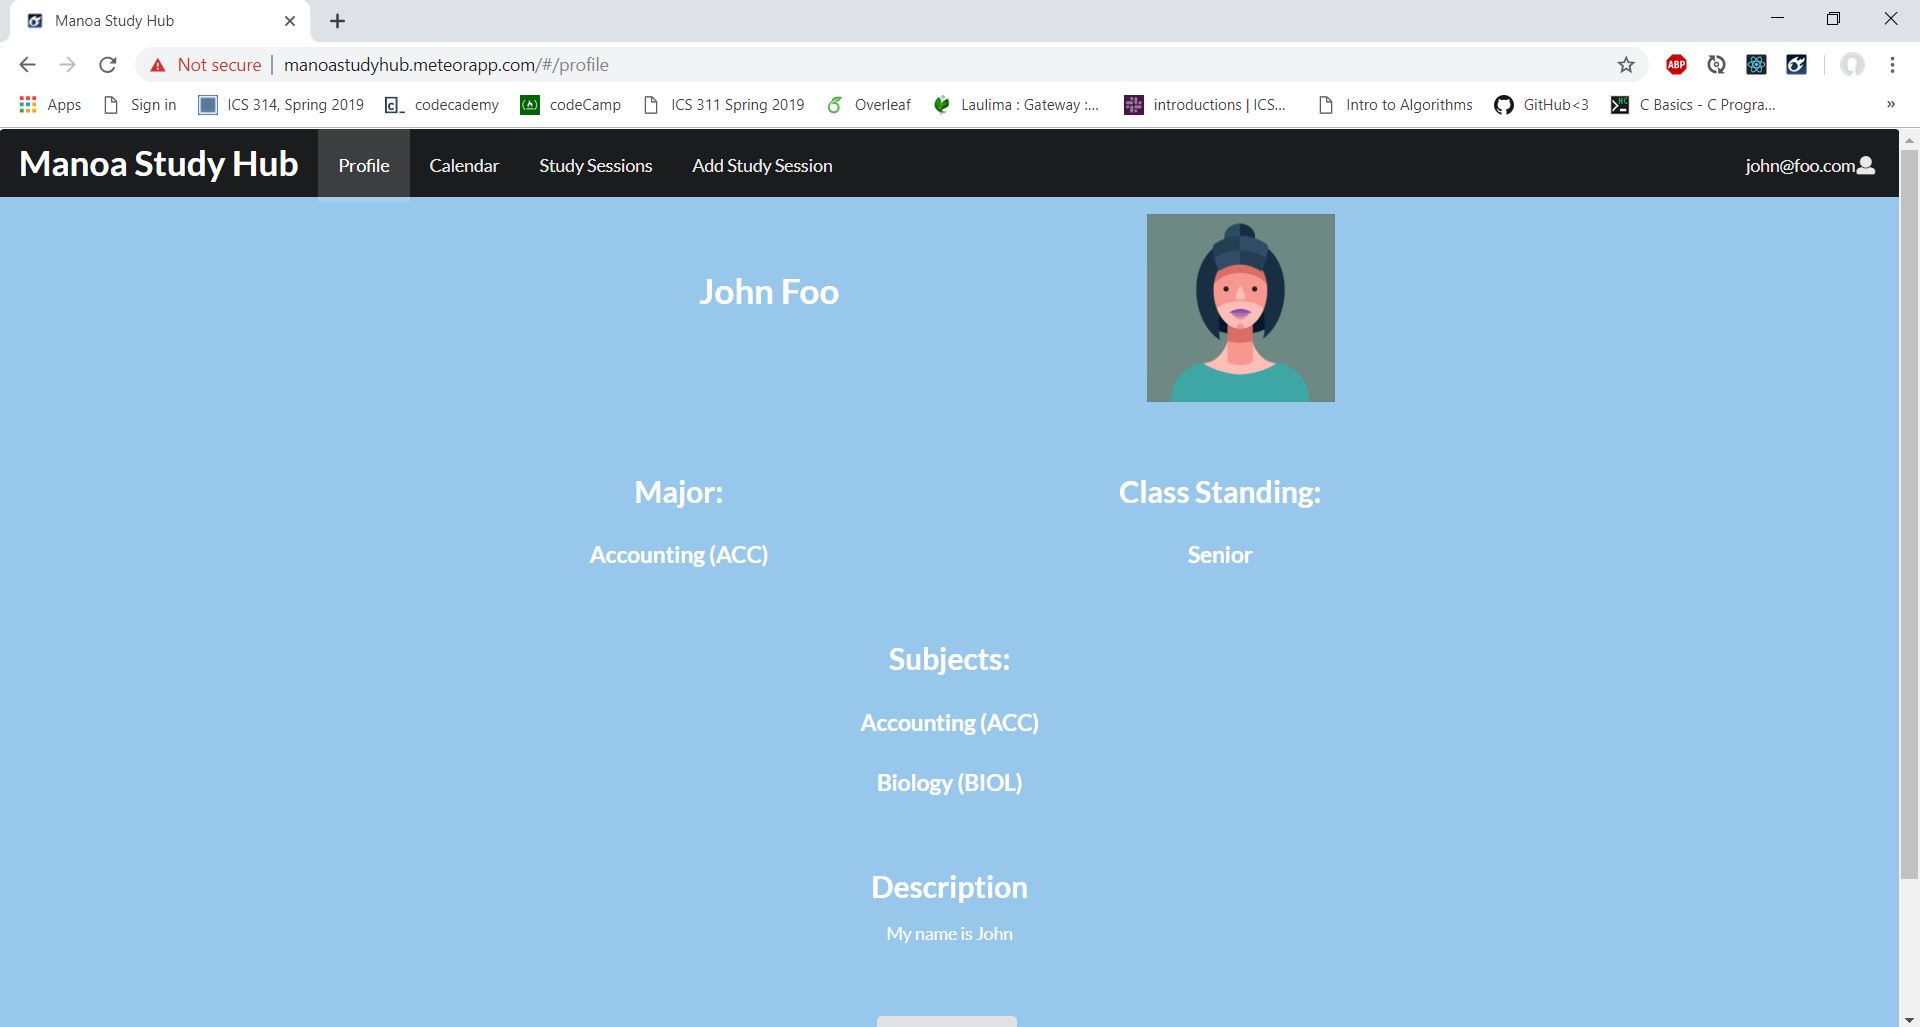
After clicking on the Profile page option on the nav bar you are taken to this page. This page shows the profile of the user who is logged in. It includes details like the users name, major, class standing, subjects, a description about themselves, and an edit profile button. If you click on the edit profile button you are then rerouted to the edit profile page.
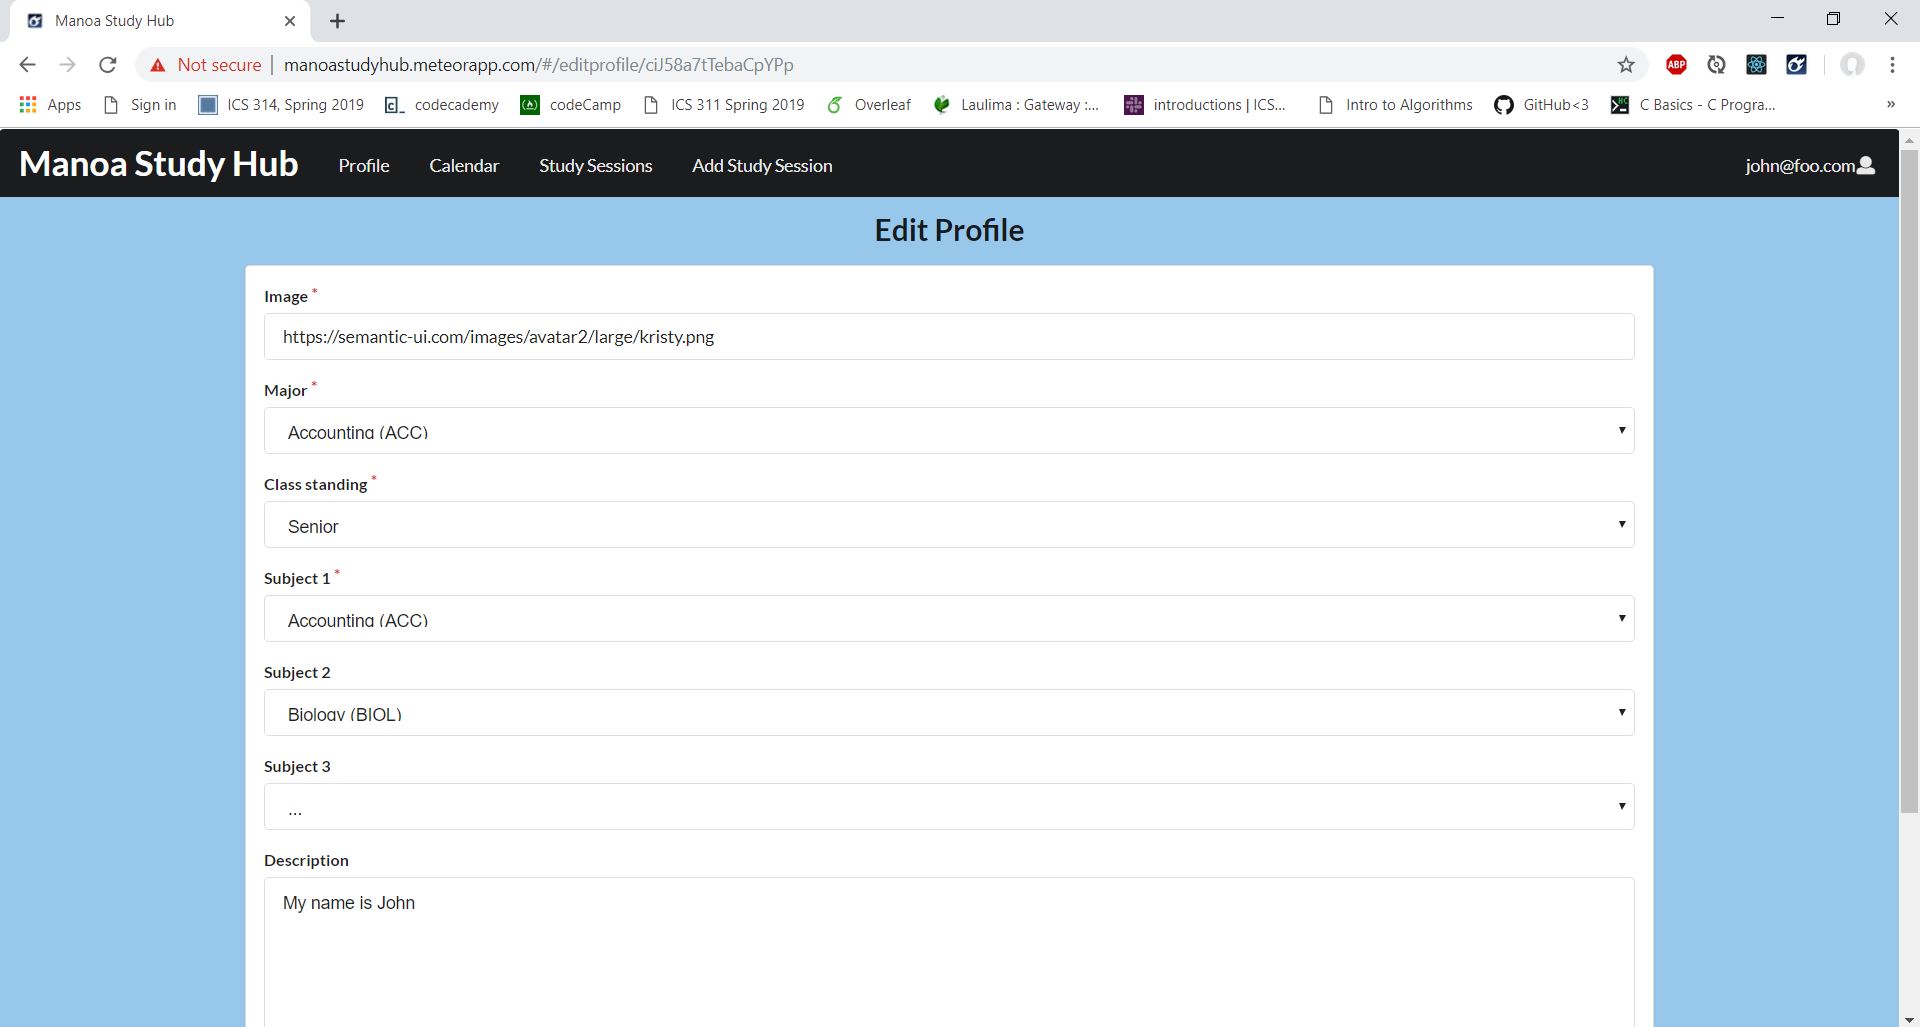
On the edit profile page the form will be filled out with the current information and you are able to edit different aspects of your profile such as: the image, major, class standing, subjects, and description. It is also equipped with a submit button, which when clicked and if the form is filled out adequately you will receive a confirmation alert at the top of the screen.
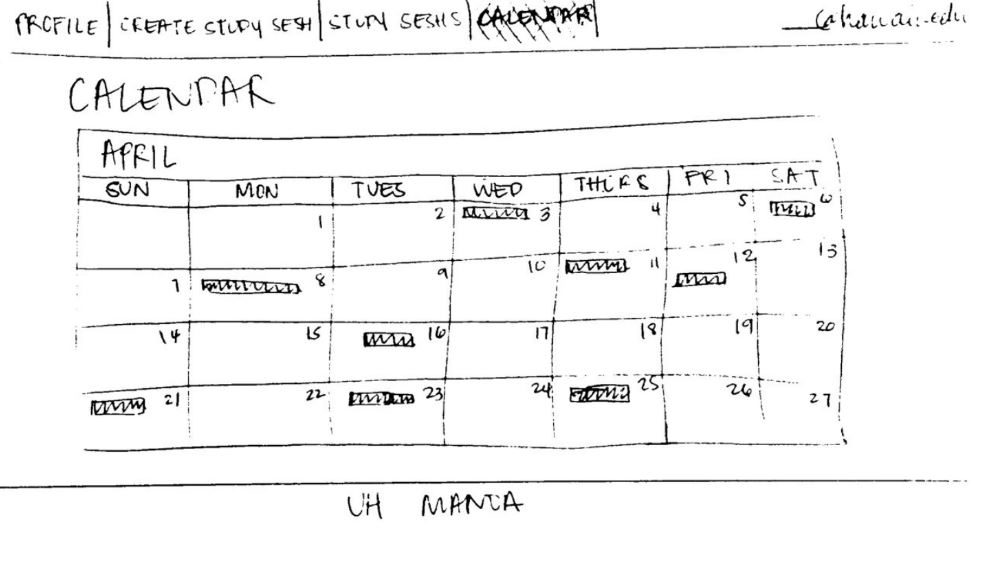
Calendar Page
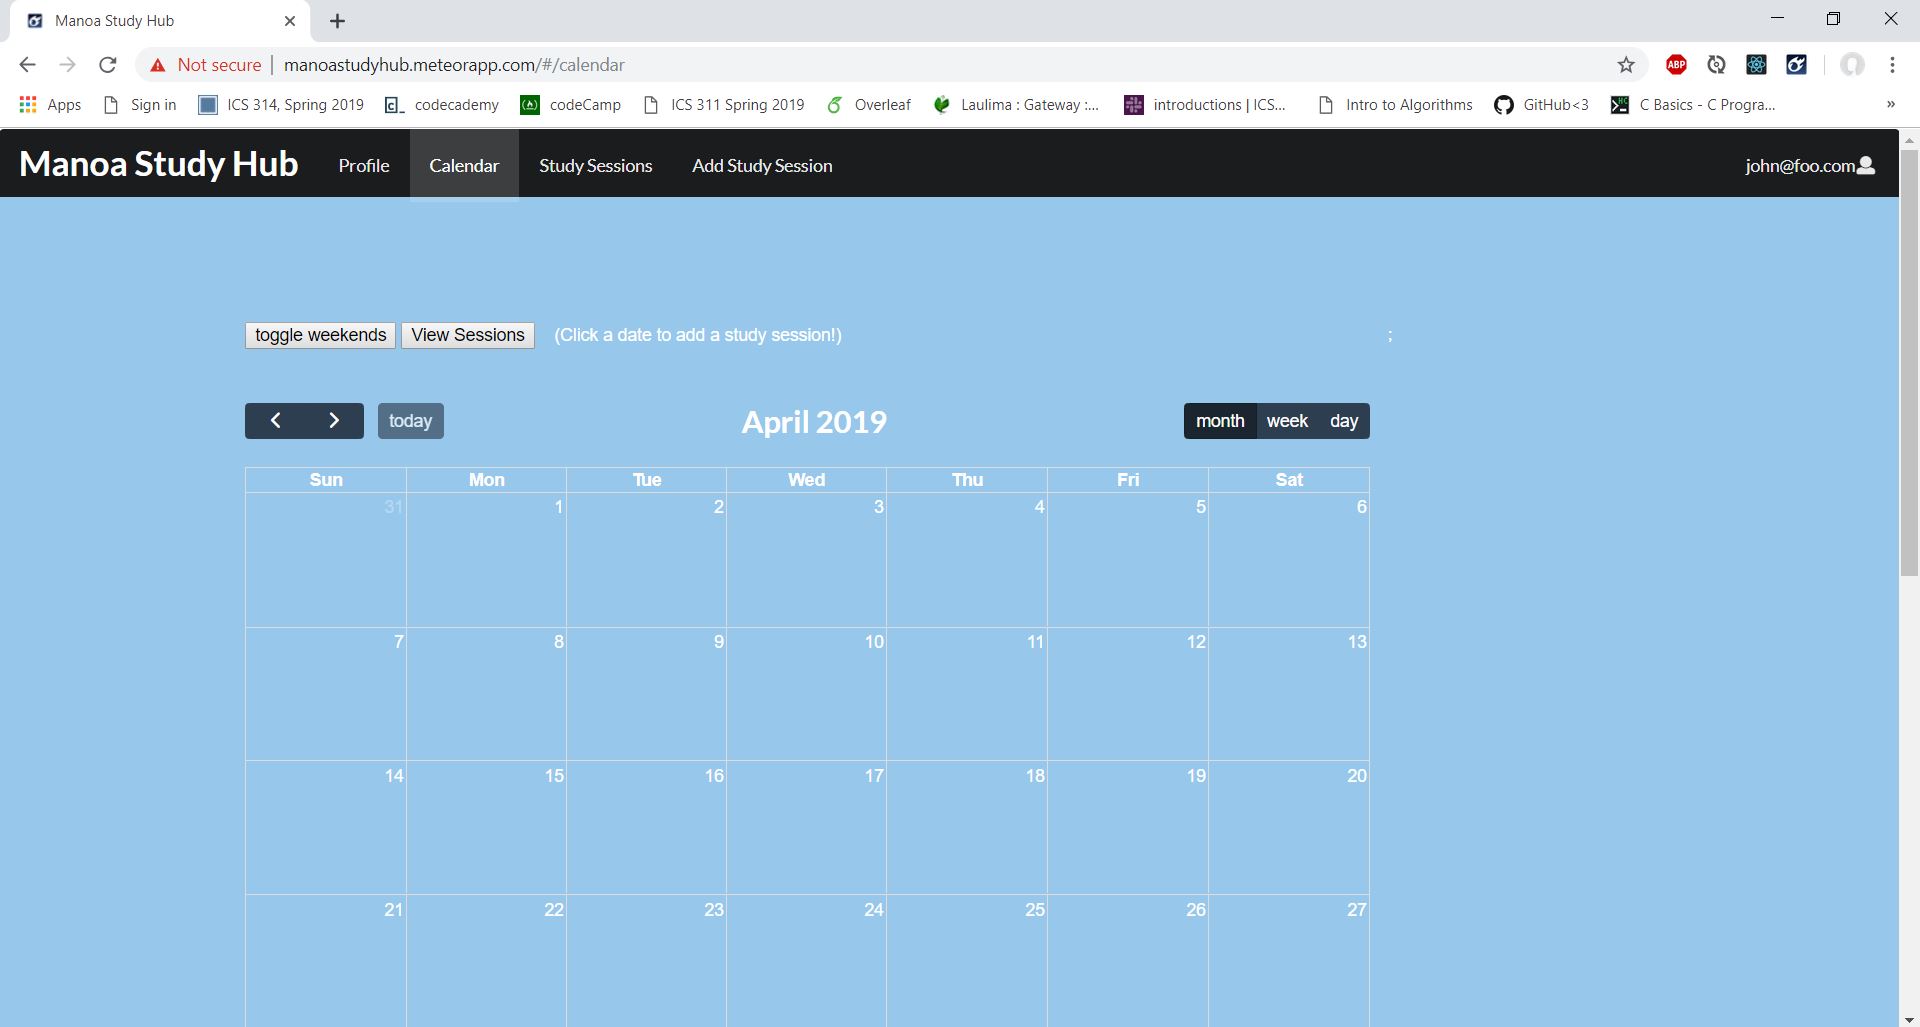
After clicking on the Calendar page option on the nav bar you are taken to this page. On this page you are able to view a calendar which will show the previous, current, and upcoming study sessions. You are able to utilize the buttons at the top of the page to toggle the weekends and to view the sessions that are listed. There are also buttons that allow you to see different views of the calendar by month, week, or day as well as previous or future months. You can also click on a date to add a study session which will pop up a confirmation window.
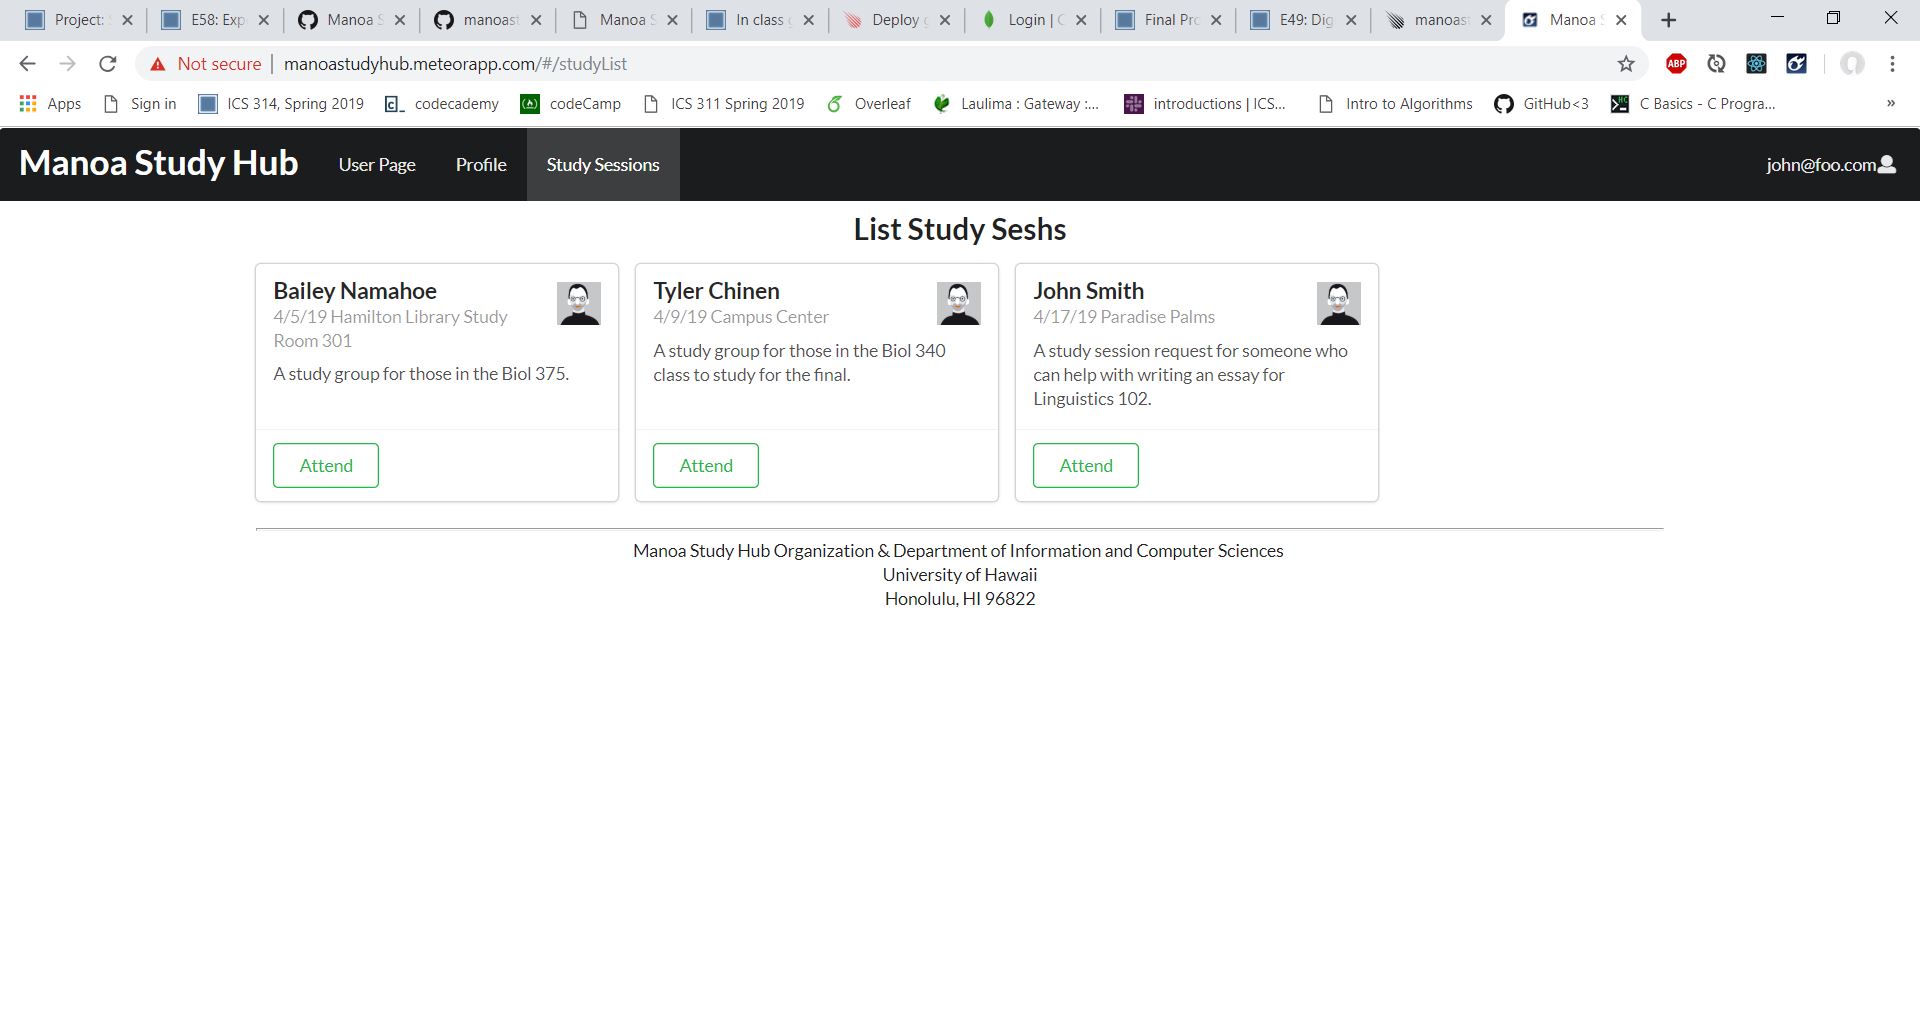
List Study Sessions Page
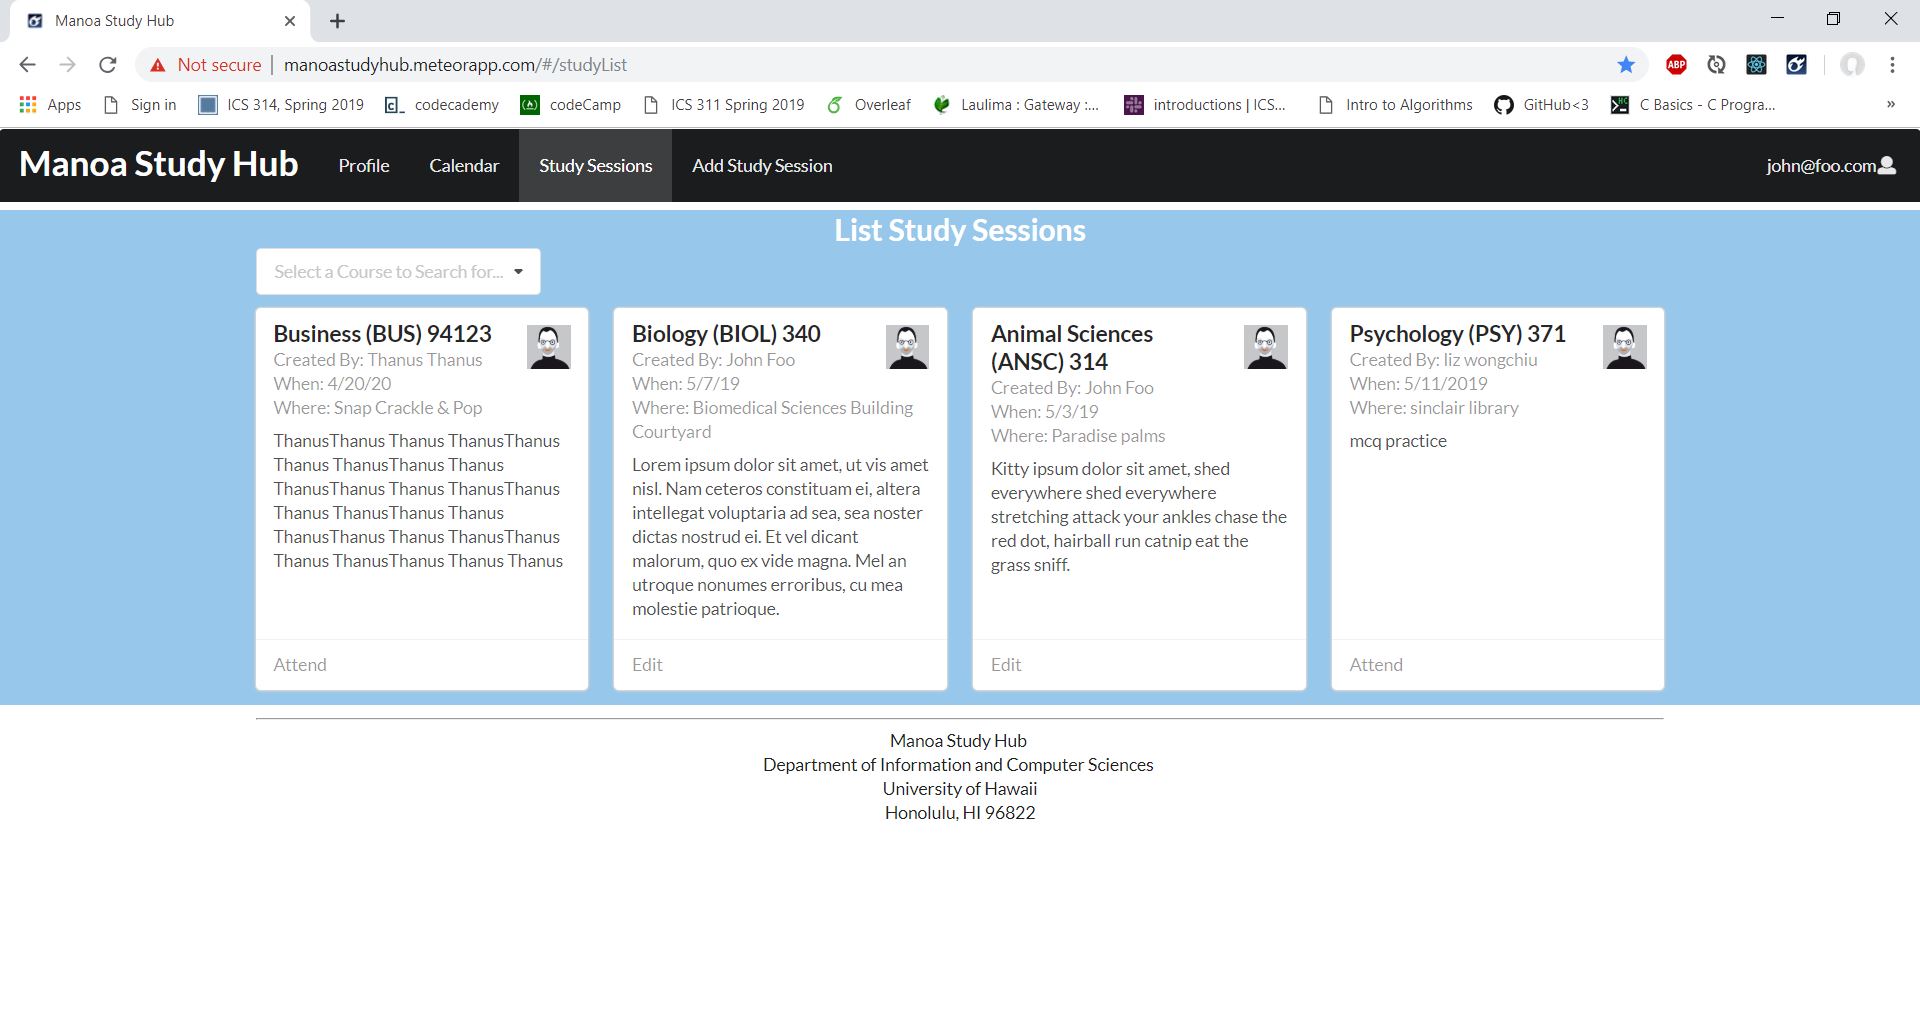
After clicking on the Study Sessions page option on the nav bar you are taken to this page. On this page you are able to view the cards of study sessions that have already been created. You are able to view all of the information that you should need in order to decide whether or not you wish to attend this study session. Should you choose to attend, you can use the attend button which will then give you an alert at the top of the screen which states that your session has been added to the list of sessions that you plan on attending. This page is also equipped with a dropdown search bar where you can select and search for the courses that you would like to view the study sessions for. You are also able to delete the courses in the search bar that you no longer what to search for.
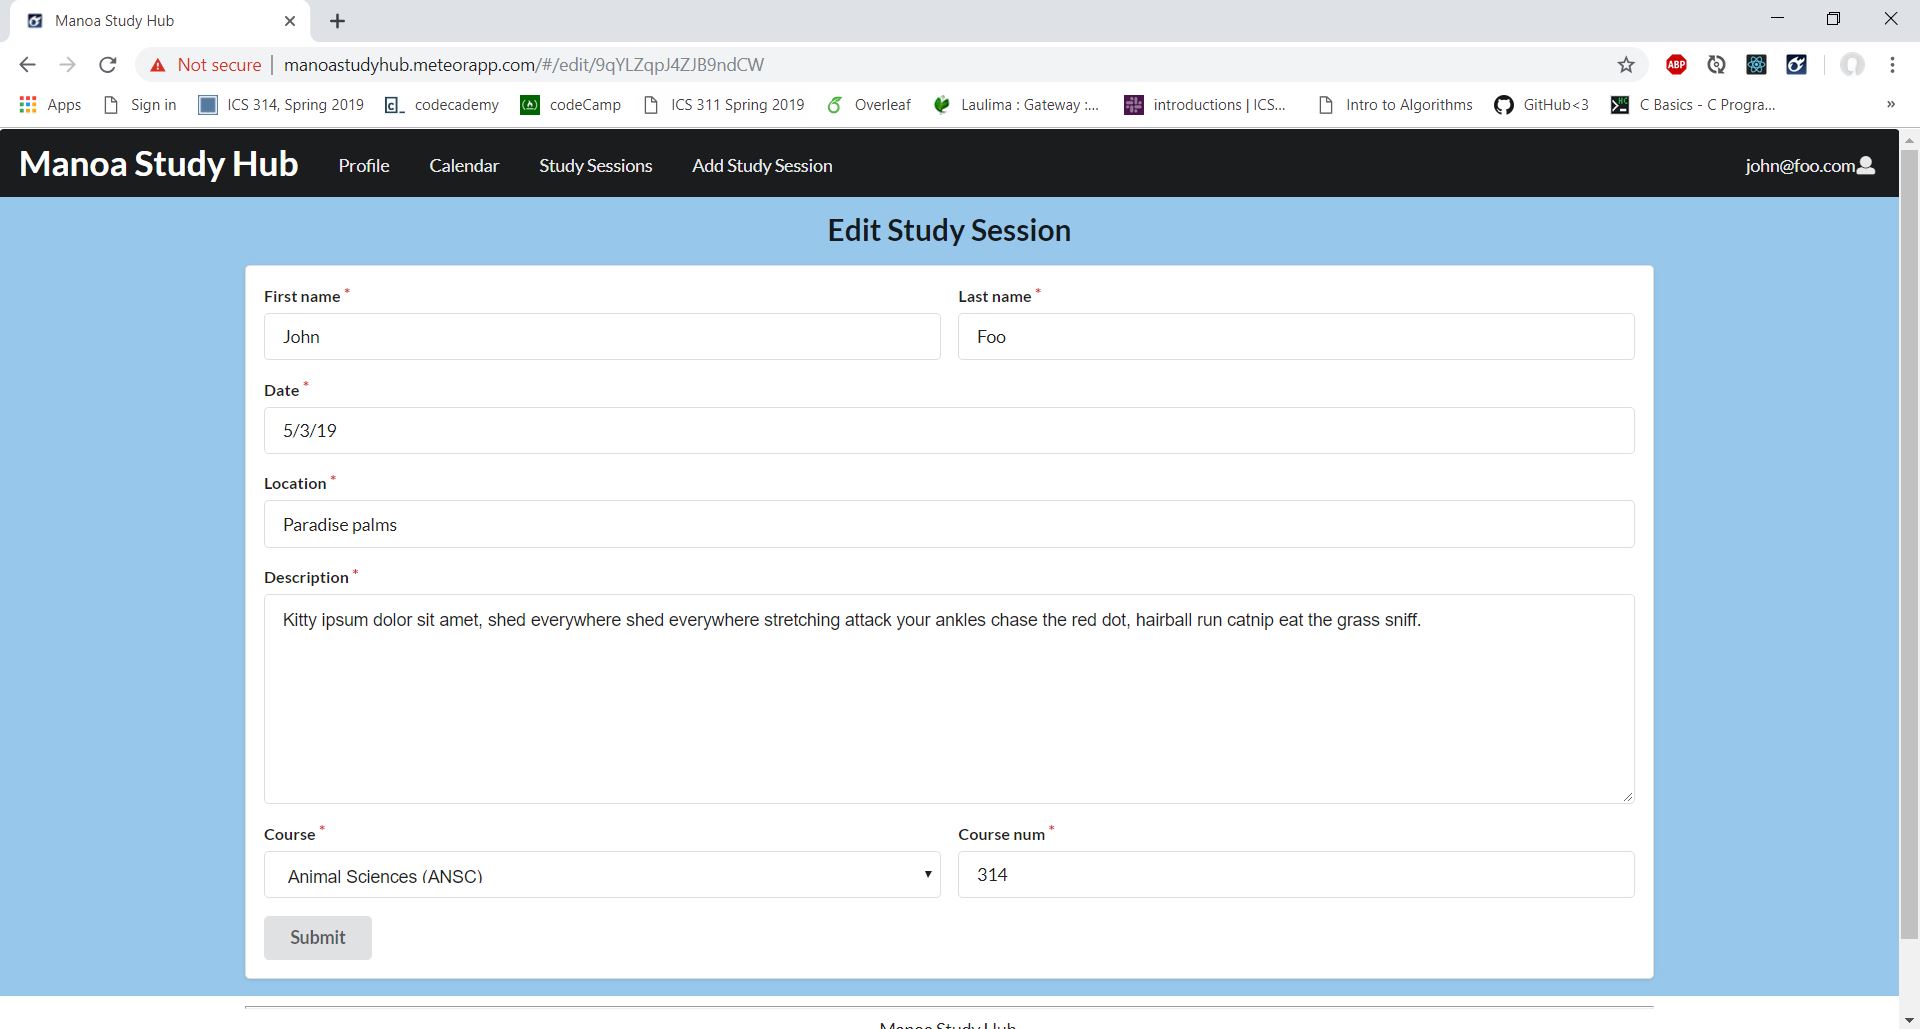
If you are the creator of the session there will also an option to allow the user to edit the sessions that they have created. Upon clicking the edit button you are rereouted to the edit study session page which which will be filled out with the previously added information that you are able to edit. After hitting the submit button your changes are added and an alert tells you that your updates have been made.
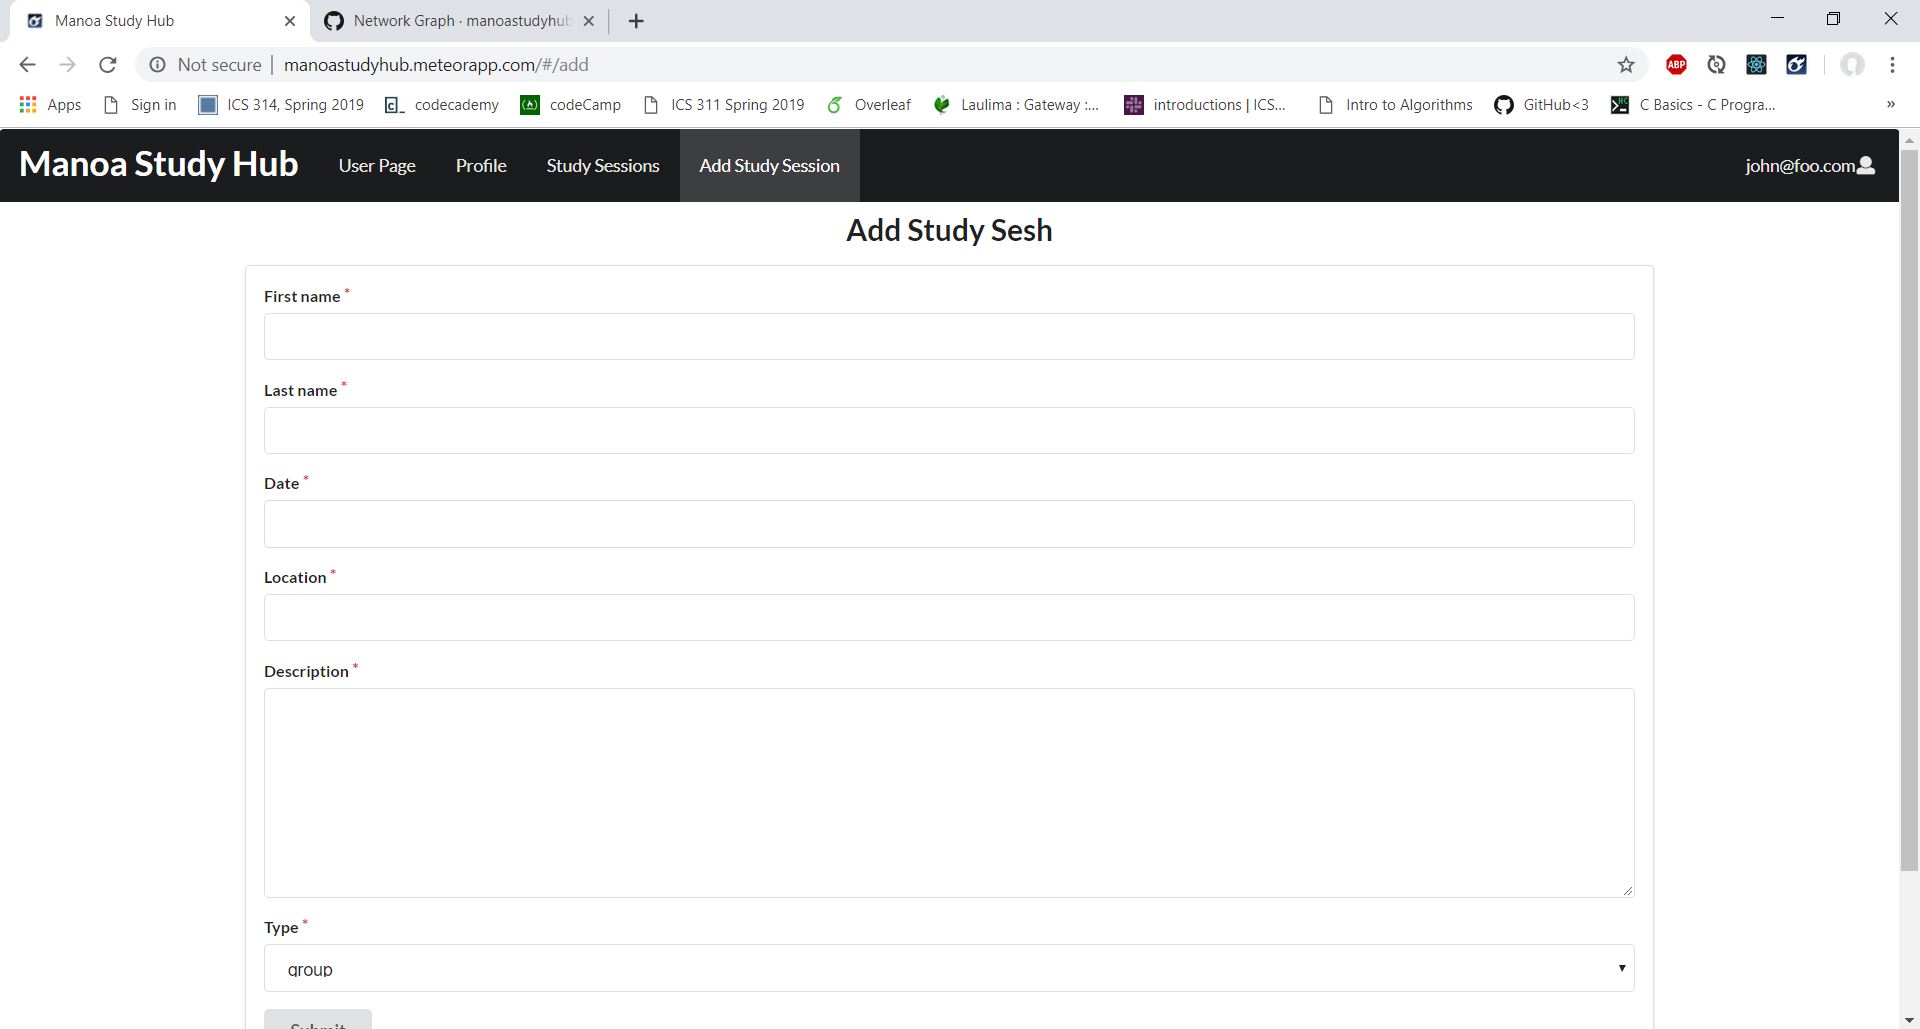
Add Study Session Page
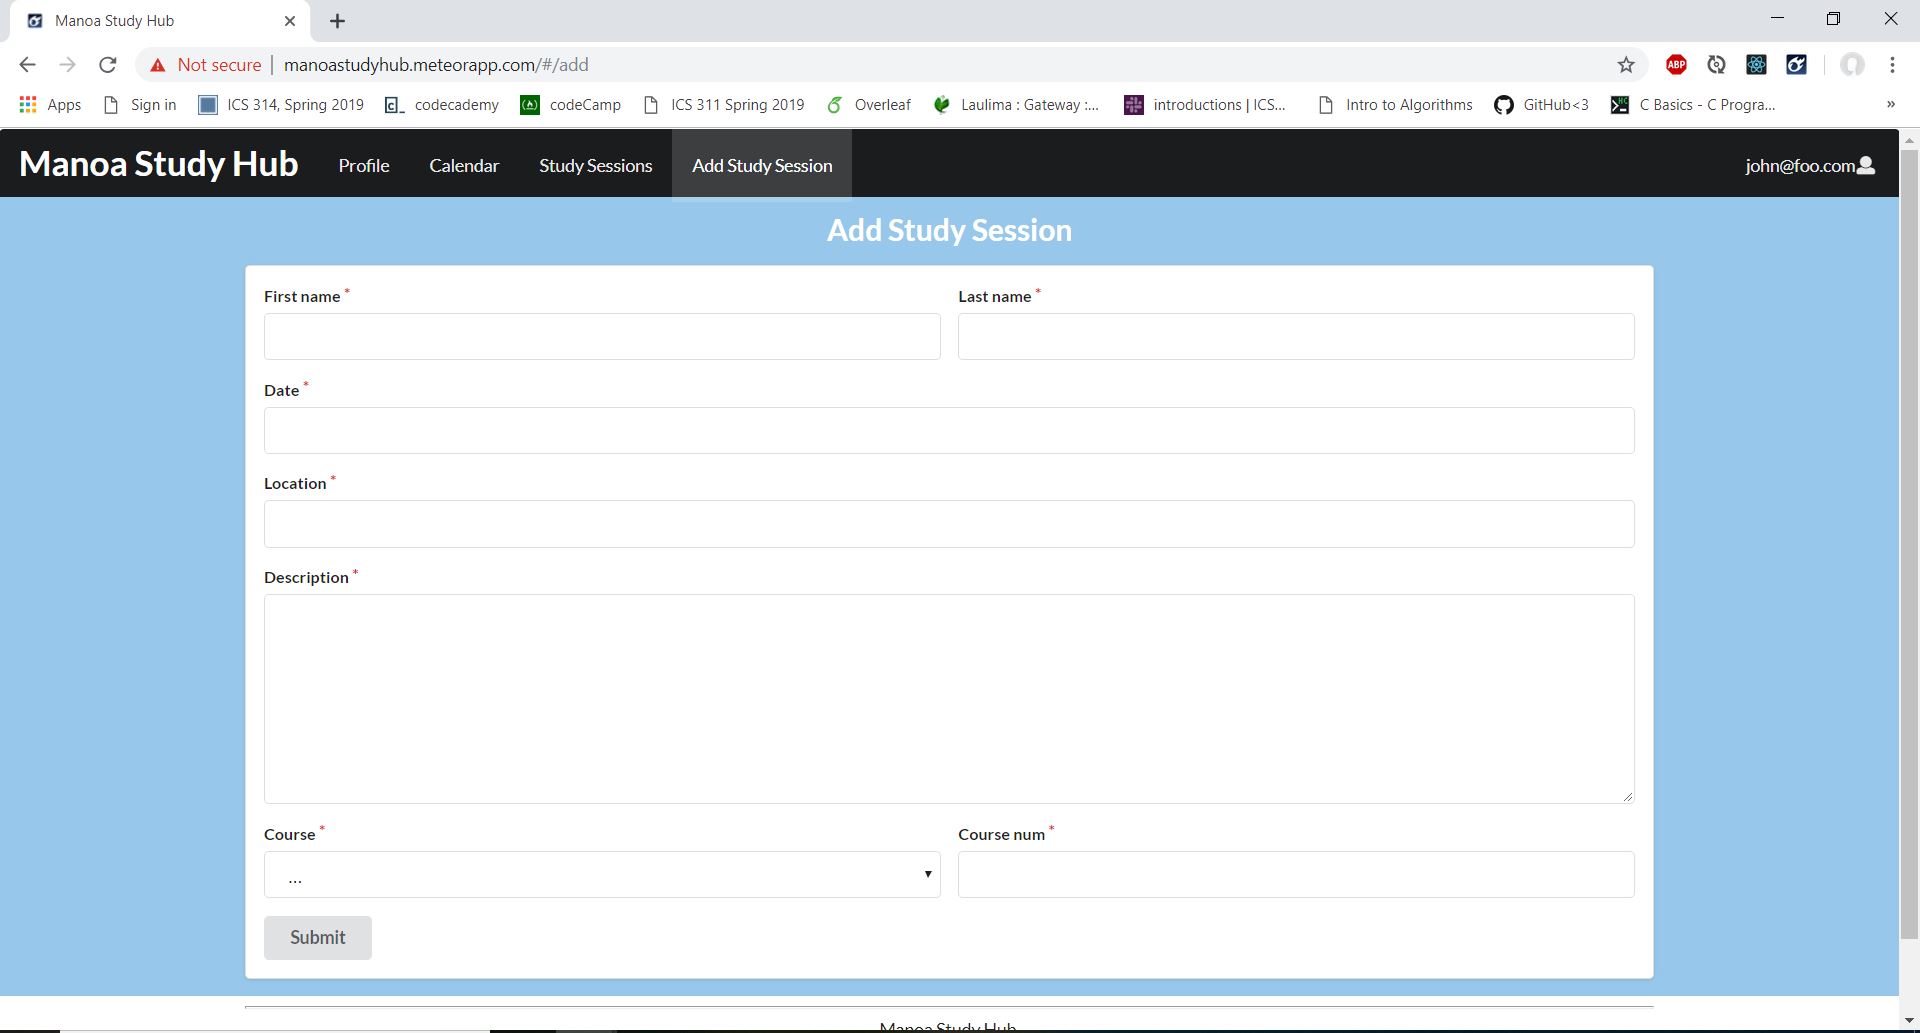
After clicking on the Add Study Session page on the nav bar you are taken to this page. On this page you are able to fill out all of the fields that provide information about the study session you are creating. These fields include first name, last name, date, location, description, the course and the course number. After filling out all of the fields you can then use the submit button which will then create an alert telling you that your session has been added if all of the information was filled out correctly.
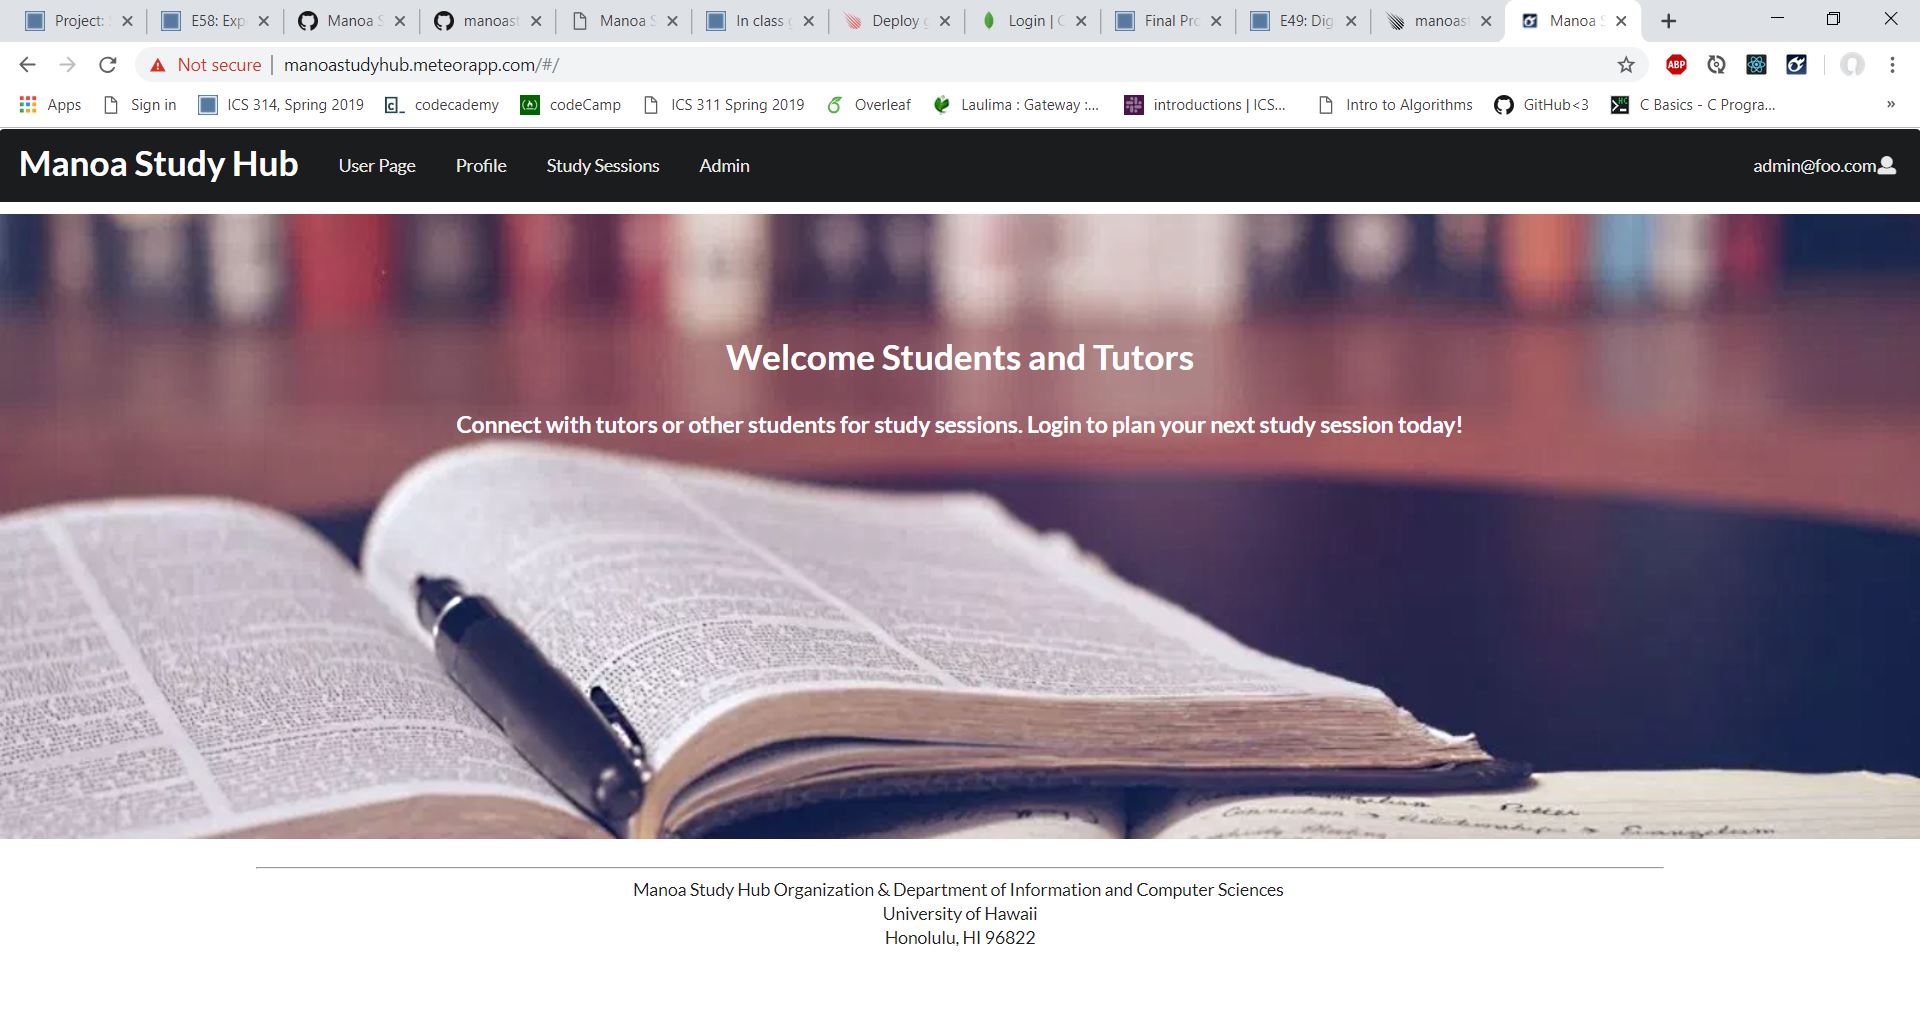
Admin Landing Page
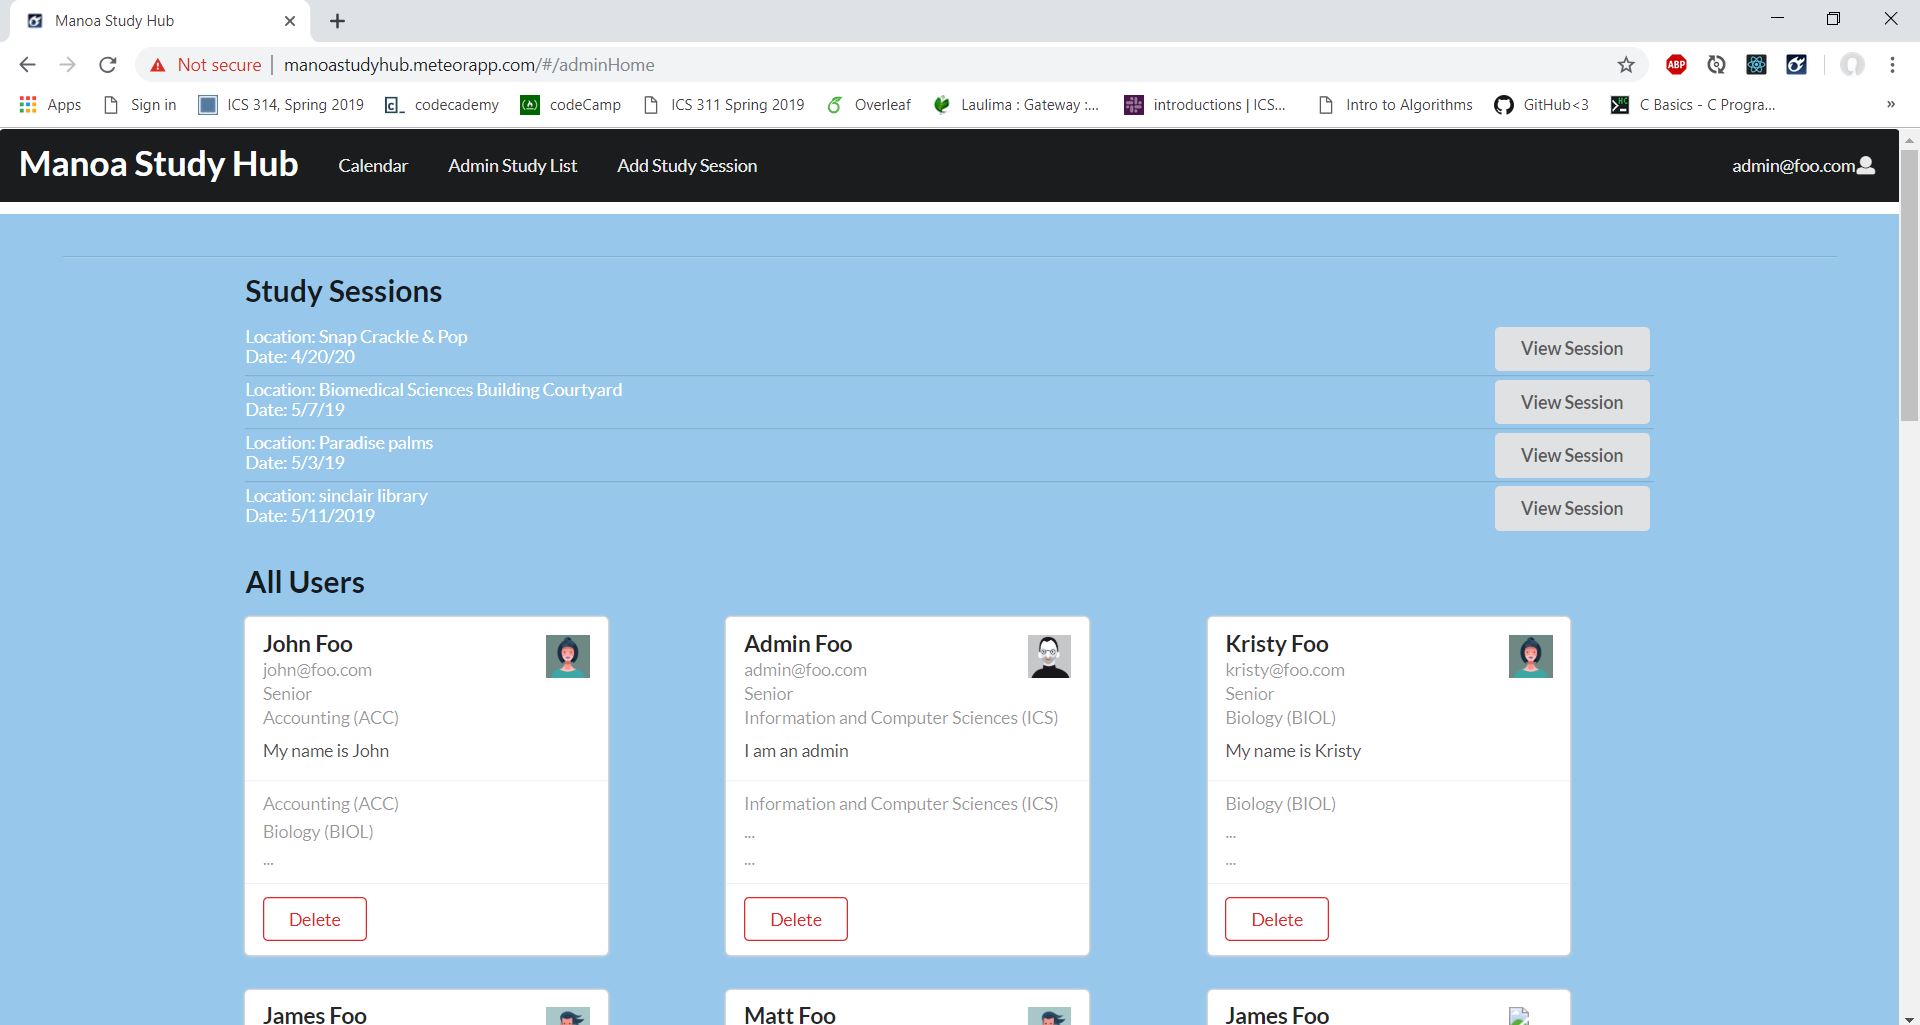
After logging in as an admin you are able to view this page which lists all of the upcoming sessions and students. From this page the admin is able to view the session with the corresponding button and are able to delete them if they wish to.
Admin Study List Page
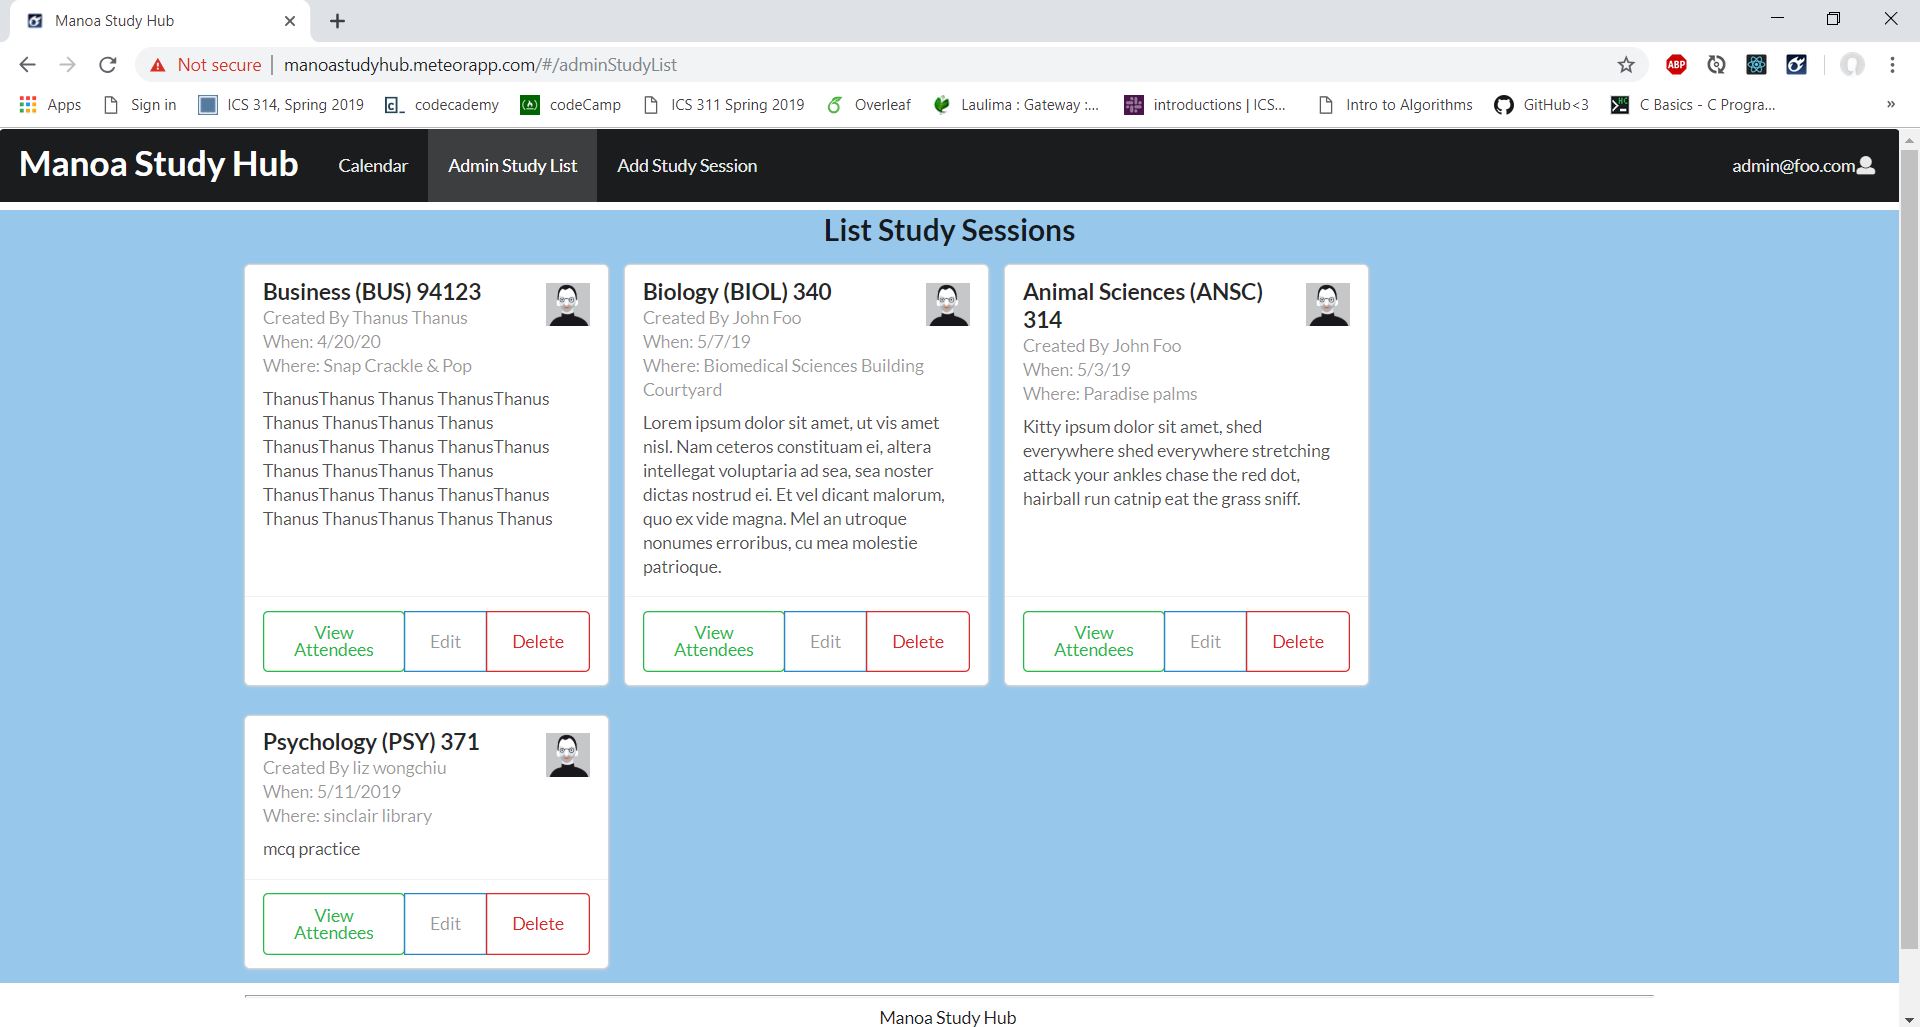
After logging in as an admin you are able to view this page which lists all of the upcoming sessions. The study session cards are also equipped with buttons to view attendees, edit, and delete.
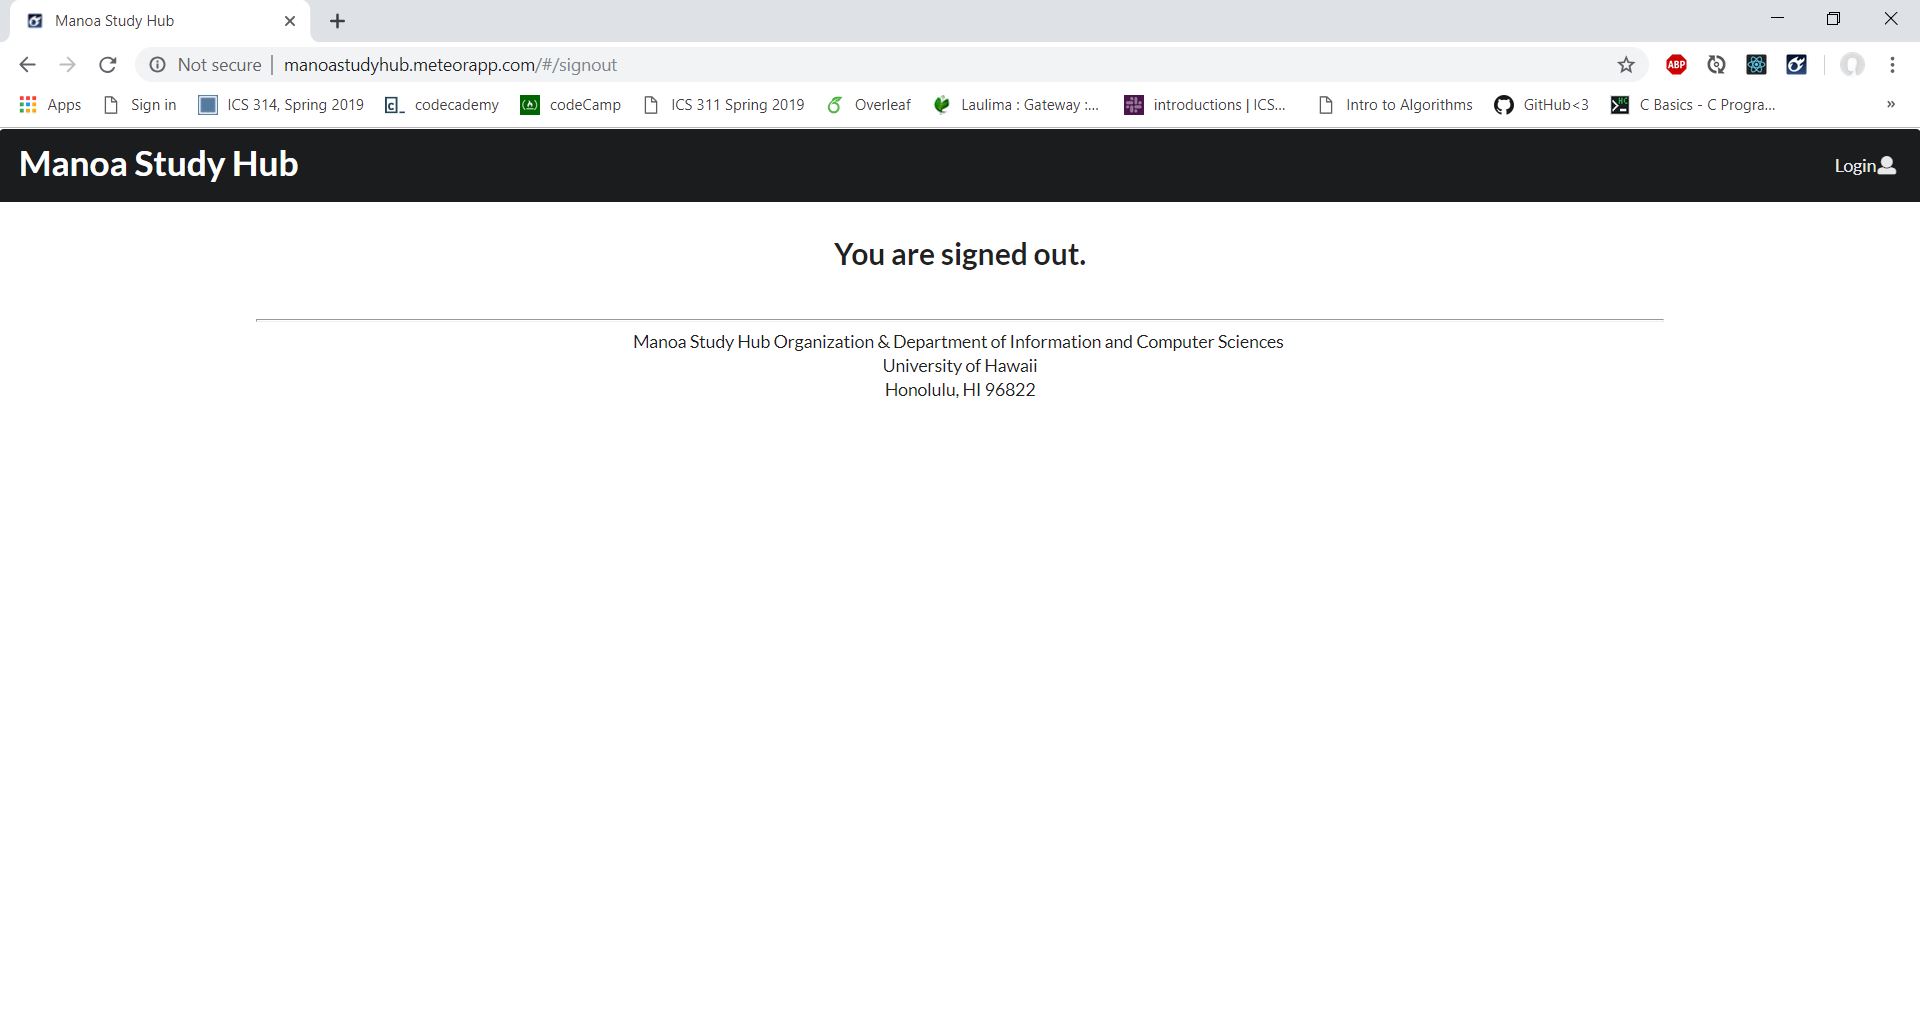
Sign Out Page
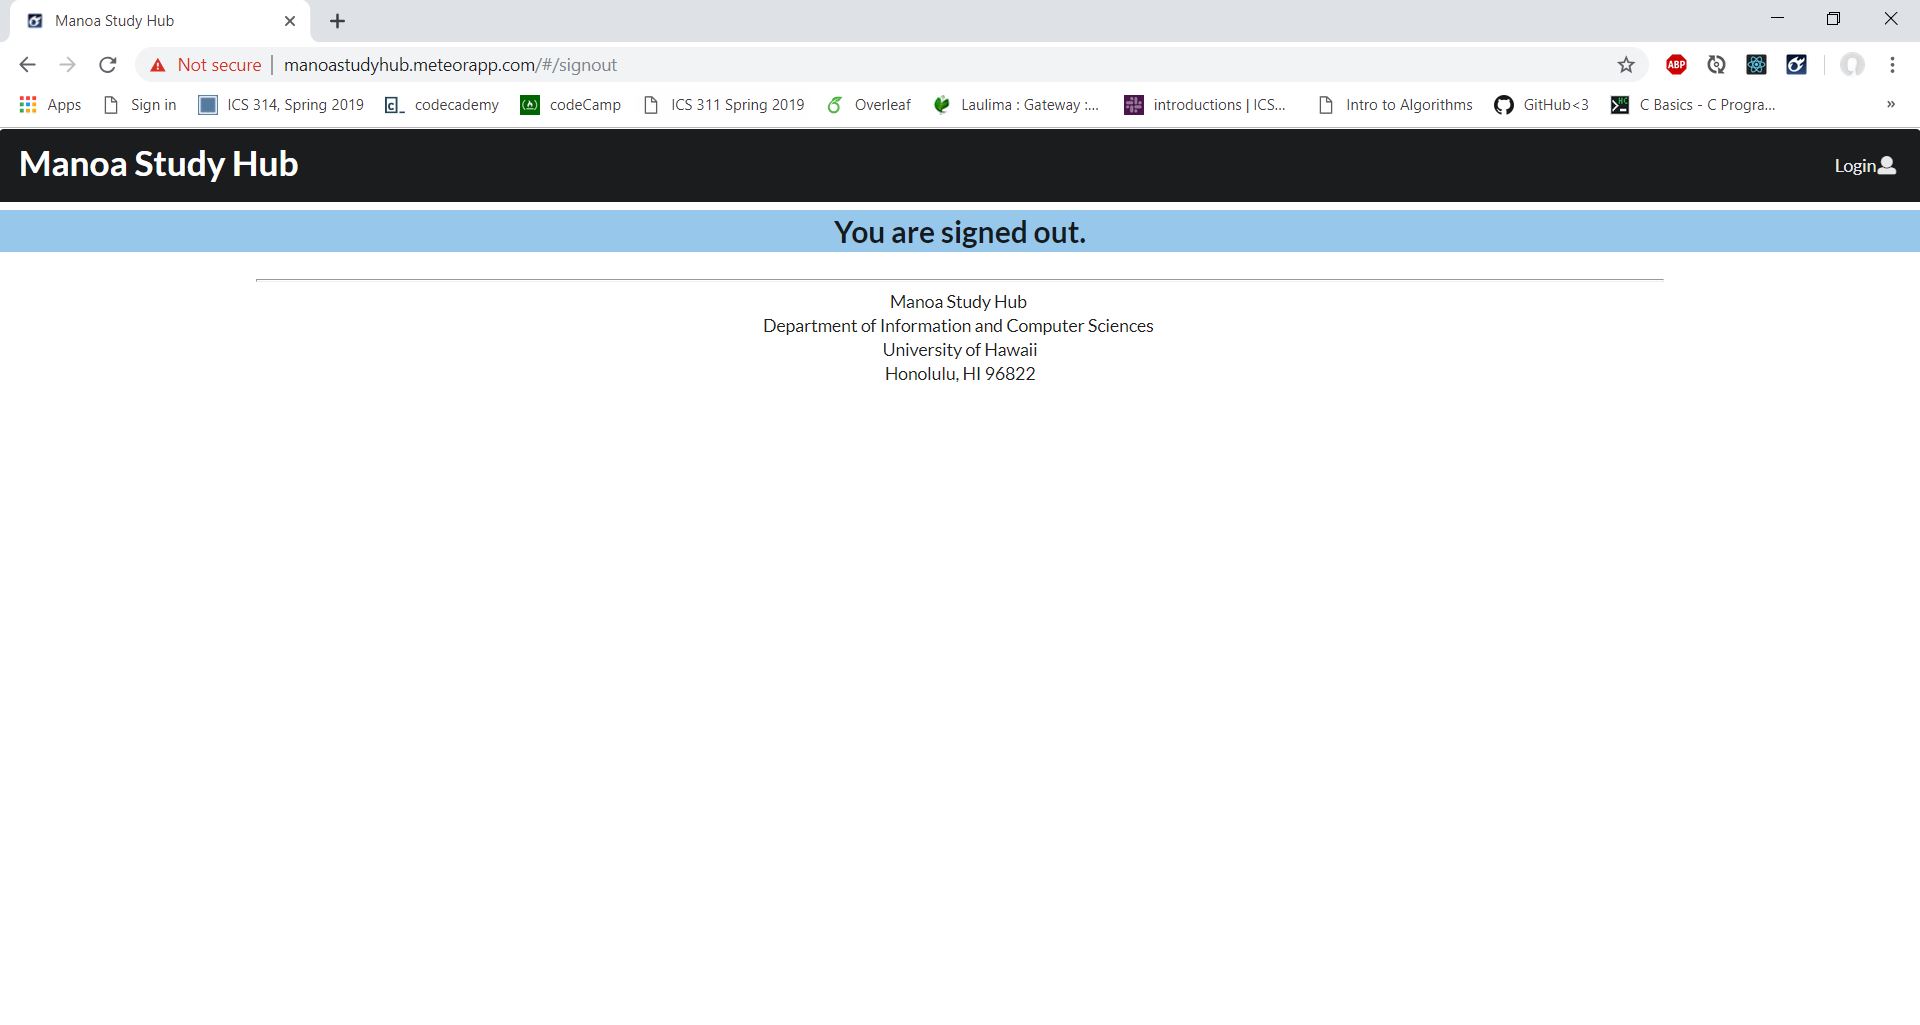
Upon clicking on the email of the user that is logged in you are given a drop down window that gives you the option to log out, which when clicked will reroute you to this page after you have successfully logged out.
Developer Guide
Installation
The following steps will walk you through installing and running the application locally.
-
In order to begin using the application you will need to install Meteor
-
Next, you will need to download a copy of Manoa Study Hub. You should note that you may need to request permission from the authors in order to access the repo.
- Then, in the command prompt you will need to cd into the app directory (within the code-directory file) and install the Meteor library as follows:
meteor npm install - After Meteor has been installed, you can then run the application by using:
meteor npm run start - After the app runs for the first time, it will create some default data and users. The output should look as follows:
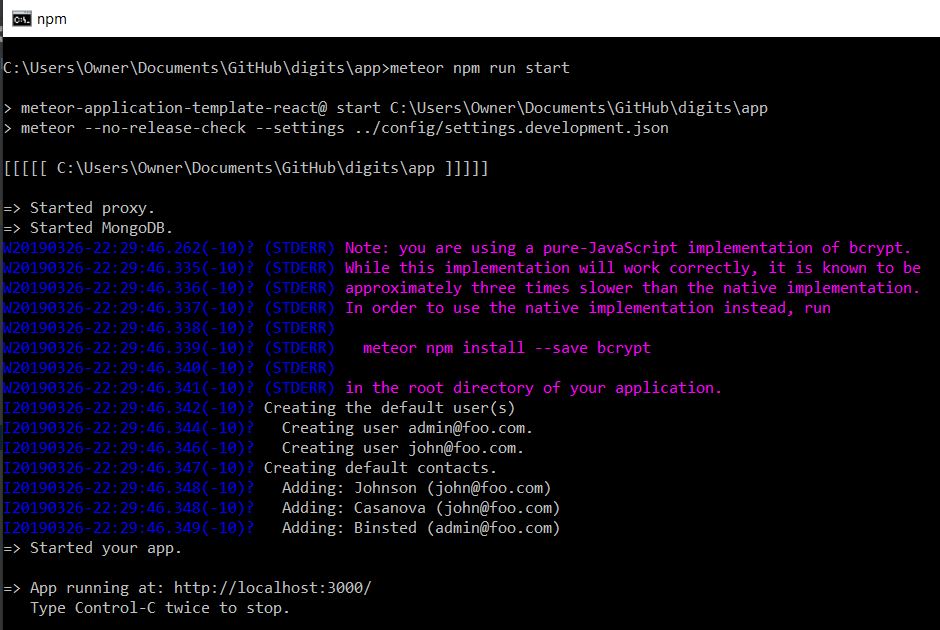
*It is important to note that there is a bcrypt warning which will try to encourage you to use bcrypt. However it is difficult to install bcrypt with Windows operating systems. Bcrypt is unneccesary for the purposes that we are using for so it is okay to just ignore this warning, it will not interfere with the use of the application.
- If there are no errors, the template application will appear at http://localhost:3000/. You can then login by using one of the default accounts at settings.development.json.
7.You can also use ESLint in the imports directory to check for general errors by using:
meteor npm run lint
Modifying the System
Should you wish to modify the system and make your own changes you can follow the steps below to guide you through the process that we used while developing this application. The framework that our group used while developing this website followed the issue driven project management guidelines (IDPM).
To begin each change that we planned to implement, we first needed to create a new ‘issue’ on the GitHub repository that contained our project code under the ‘issues’ tab. The issue should be labled with the the corresponding number issue that we are working on such as issue-1 or issue-2 etc. It should then be assigned to someone who has agreed to complete the task.

After we created our issue, we would then go to our ‘Code’ tab on GitHub and create a branch off of the most updated branch (usually the master). From there we would then deploy to GitHub Desktop by using the ‘Clone or download’ button and selecting the ‘Open in desktop’ option. This should effectively bring up the GitHub Desktop application which can be downloaded here. Once you are on GitHub desktop, you should check that the branch that you have created is the same as the current branch listed at the top of the application. Leave this window open. Next you can open IntelliJ to begin making changes to the code and resolving the issue that was created. Once the issue has been resolved you should then go back to GitHub Desktop and write a short summary of the changes that were made in the text box labeled ‘Summary (required)’. Then, can commit the changes by utilizing the button ‘Commit to issue-2’ with the issue name corresponding to the issue that you were working on. After a brief loading period you can then push the changes to GitHub. After pushing the changes you can then check the web version of GitHub to ensure that your changes have been added and saved to GitHub.
Since we were working in a group, after a reasonable amount of work was completed it was necessary to merge all of our work together to have all of the changes that we made in one place so that we could have all of the updated functionalities of our application. Some brief instructions for merging can be found here. After merging we then used Galaxy to deploy our application. Some further information and instruction to deploy to Galaxy can be found here.
The result after deployment can be seen here.
Development History
Throughout the development process, we conformed to the Issue Driven Project Management (IDPM) guidelines. In summary, this means that the team effectively communicated with each other at least twice a week, milestones were accomplished in sets of tasks that were divided into approximately 2-3 days of work which were assigned in github projects as issues. Each team member is ultimately responsible for at least 2 issues during each milestone and must have them completed before the deadlines.
The development history of Manoa Study Hub is shown in the following milestone sections.
Milestone 1
This Milestone began on April 1, 2019 and ended on April 10, 2019.
The goals of this Milestone included creating mock up pages, utilizing Github projects and issues to help manage the development process for this project, and learning how to deploy our project to Galaxy.
Mock-Up Pages
Mockups for the following pages were created during Milestone 1 and have been deployed to Galaxy:
Calendar
Utilizing Github Issues
In Milestone 1 we implemented the Github issues as shown below:
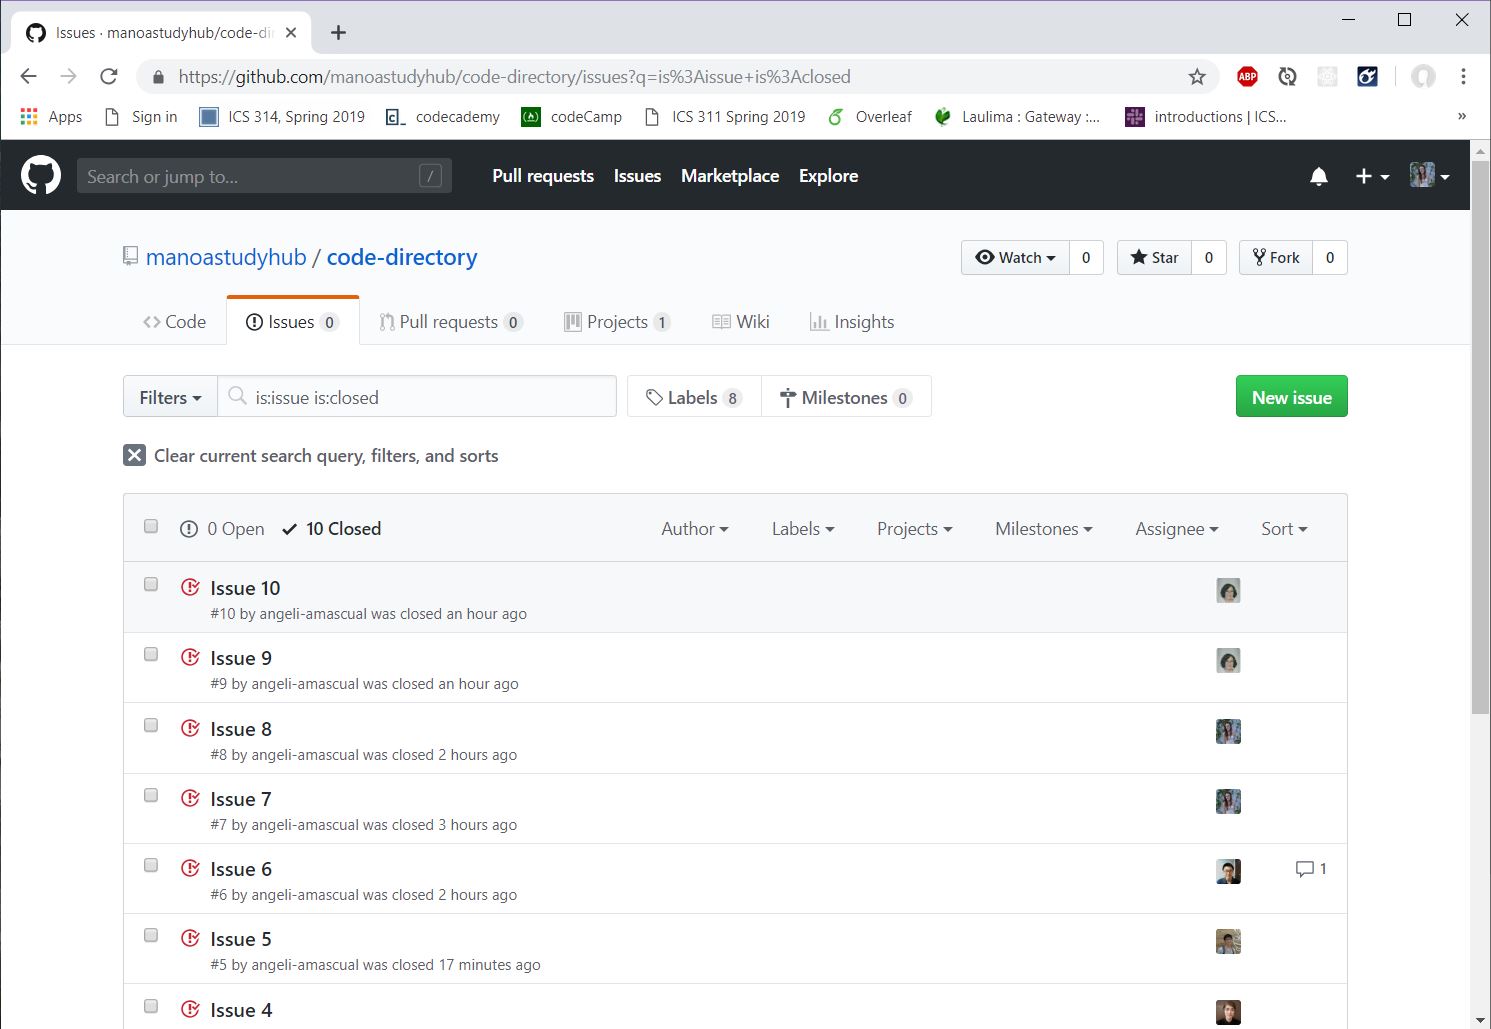
In Milestone 1, we also created and resloved 13 issues that dealt with creating the mockup pages and the basis of our site’s collections. These issues were monitored through the Project M1:

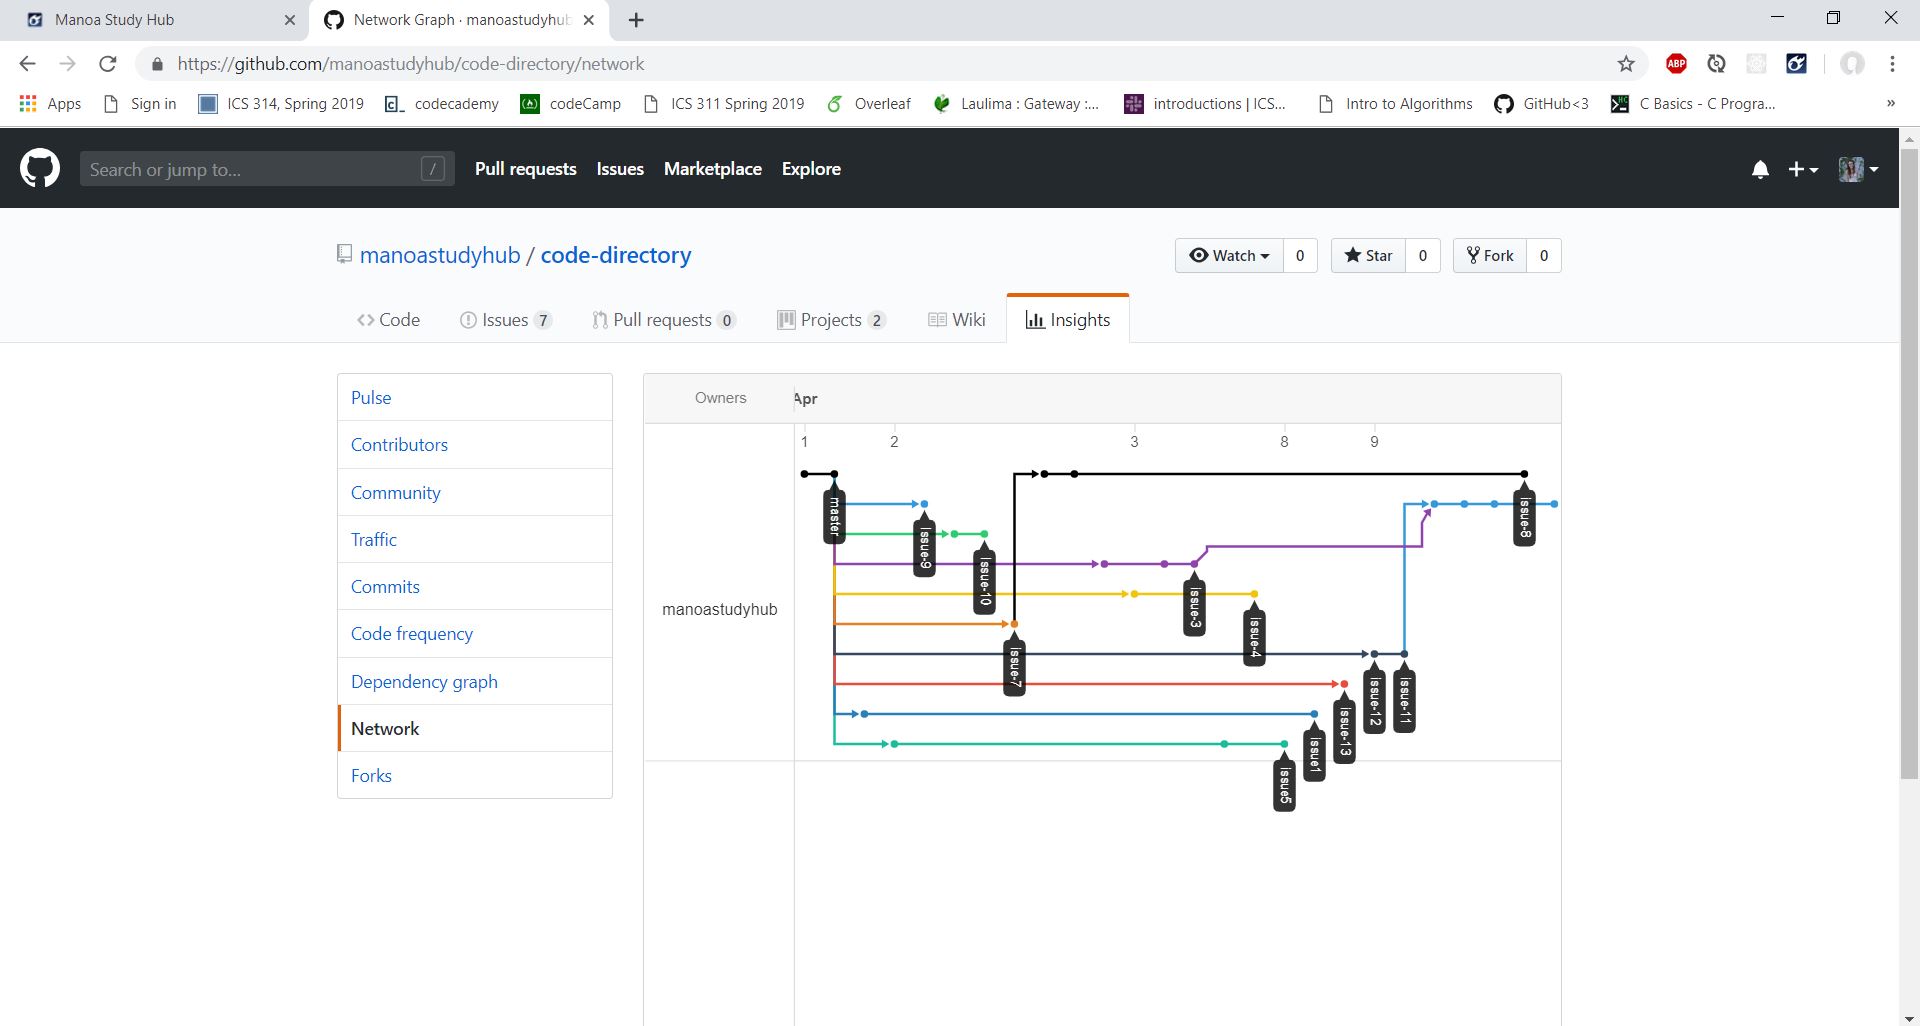
Each Issue was implemented in it’s own branch and was merged with the master:
Milestone 2
Our work on Milestone 2 started on 4/8 and finished on 4/21. Here is our M2 project which contains all of the issues we worked on for Milestone 2. All of the issues and their corresponding branches were merged with the master.

Milestone 3
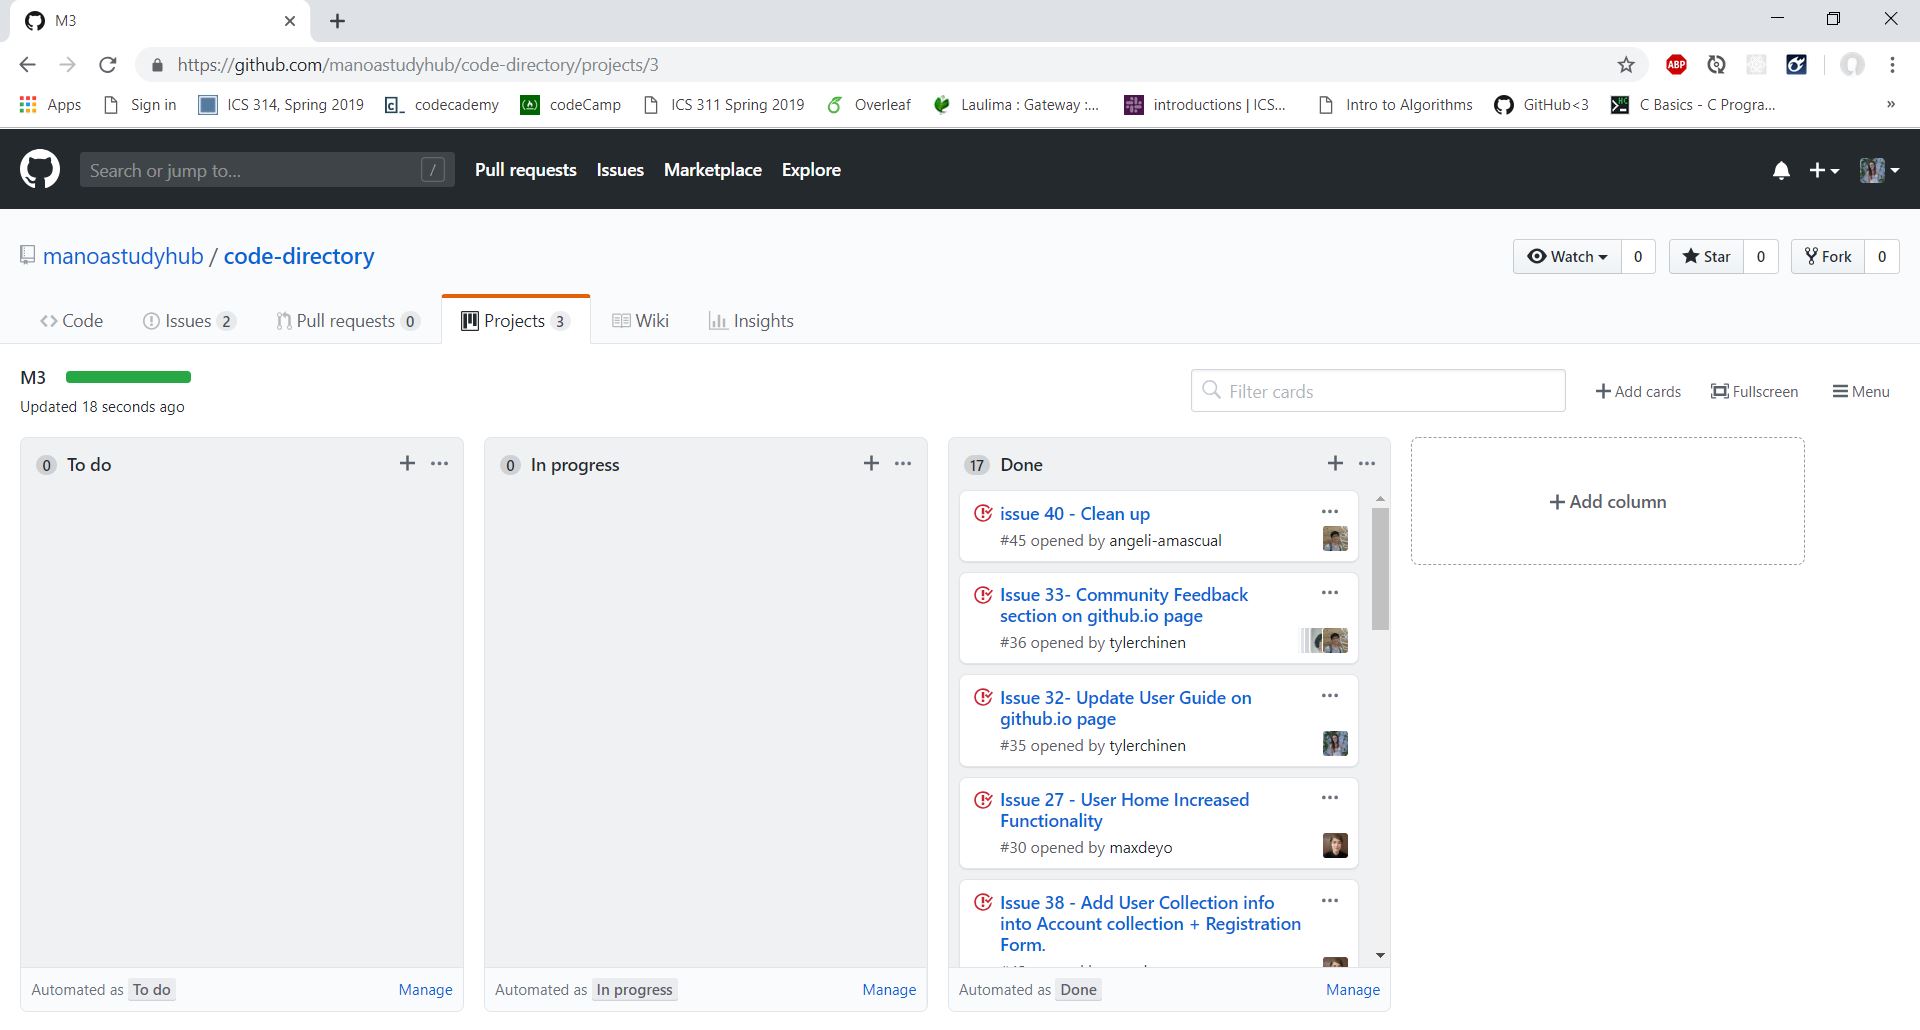
Our work on Milestone 2 started on 4/21 and finished on 5/1. Here is our M3 project which contains all of the issues worked on for Milestone 3. All of the issues and their corresponding branches were merged with the master.
Community Feedback
Elizabeth Wongchiu: University of Hawaii at Manoa international exchange student
- Likes:
- The simplicity of the layout
- Clear and easy to understand/navigate
- Improvements:
- Adding a time for the study session
- A maximum number of study members
- Know how many signed up
- Comments:
- It’s cool how you can personalize it
Radford Leong: University of Hawaii at Manoa MIS Business Student
- Likes:
- Easy to use and navigate
- Calendar makes sessions easy to see
- Improvements:
- Redirect after editing profile
- Looks odd if no study sessions/people are showing on home page
- Comments:
- White text can be difficult to read on light blue background
Cameron MacDonald: University of Hawaii at Manoa Geology Student
- Likes:
- Site Layout
- Add user and add Study session work well
- Improvements:
- Upload Image without text field
- Contact other Students
Matthew Iseri: University of Hawaii at Manoa Civil Engineer
- Likes:
- Homepage layout is clear
- Profile and session boxes make information easy to see
- Search bar is convenient to search for specific course
- Improvements:
- Everything should not be blue (inside calendar and Profile page)
- After editing and submiting changes it should rereoute you back to the main pages not just stay on the edit pages.
- Comments:
- Layout of the website is clear with minor details that should be improved (as listed above).
Garrison Hiramatsu: University of Hawaii at Manoa Interdisciplinary Studies-Educational Psychology Student
- Likes:
- The overall website has a very warm and welcoming ambiance. It is also helpful to know about other students studying the same subject, information to any relevant sessions, and a calendar to help you keep track of the different study sessions sign up for.
- Improvements:
- I do not see a section where I would be able to message people individually. It would be helpful if the user would be able to message other students individually to talk about their session or anything else they wish to. But if that feature is present, then I have no improvements.
- Comments:
- This sounds like a website that would be extremely useful and can help save time and student’s education.
Team
Goals
The goals that our group has for this project involves: gaining experience working as a group, creating a large-scale project, and learn and use new coding components. Most assignments in class so far have been individual work and so we want to learn how to coordinate with other people in order to achieve a final project. In addition, some of us believe this is a good opportunity to work on a large-scale project in comparison to the smaller assignments done throughout the semester. Finally, another goal we have is to learn new things and expand on the knowledge gained throughout the semester in areas such as React and Semantic UI.
Team Bios
 Tyler Chinen
Some skills that I would like to develop through working on this project would be to gain experience with working in groups. I would also like to enhance my skills of working with Meteor, Github, and Javascript. Some skills that I bring to the team are that I am acquainted with the concepts and areas that we have covered throughout this course.
 Ty Yamasaki
What I hope to gain most by working on this project is experience working with a larger project with multiple team members, specifically with how to cooperate and communicate effectively and how to work with others through Github. I also want to improve my ability to work with Meteor and React. In terms of skillsets, I am capable of working with any of the material that was covered during the class.
 Angeli Amascual
I’m familiar with all the topics we’ve learned throughout the semester such as Javascript, html, react, semantic ui, meteor, etc. I wish to gain experience with working as a group. From this I hope to learn about task distribution amongst members in a team, time management and deadline awareness for completing tasks, and learning how to reconvene with fellow team members in order to produce a single project.
 Lance Hwang
With this, project, I hope to develop skills in time management and coordinating myself in a group coding environment. I am familiar with a handful of the concepts covered in class and I hope to contribute with what I learned throughout the semester.
 Max Deyo
Over the course of this project I hope to gain experience working in a team, using Github for version control and task management and managing time and deadlines. I also hope to further develop my skills working with Javascript, React, HTML/CSS and Meteor.